> ## Documentation Index
> Fetch the complete documentation index at: https://docs.langchain.com/llms.txt
> Use this file to discover all available pages before exploring further.
# Quickstart
> Build an agent from a template
In this quickstart, you'll use the pre-defined **Email Assistant** [template](/langsmith/fleet/templates) that organizes and manages your inbox for you.
* Select a different template.
You'll interact with your agent through chat, just like texting a helpful assistant.
## Before you start
You'll need:
* A LangSmith account ([sign up here](https://smith.langchain.com/agents?skipOnboarding=true\&utm_source=docs\&utm_medium=cta\&utm_campaign=langsmith-signup\&utm_content=langsmith-fleet-quickstart)).
* A Gmail account.
* A Google calendar.
* An OpenAI or Anthropic API key (Step 1 will show you how to get one).
## 1. Get your model API key
Your agent needs an API key to connect to an AI model. The AI model is what allows your agent to understand and respond to your requests.
1. Go to [platform.openai.com/api-keys](https://platform.openai.com/api-keys).
2. Click **Create new secret key**.
3. Give it a name like "Fleet".
4. Copy the key (it starts with `sk-`).
5. Save it somewhere safe, you'll need it in Step 2.
1. Go to [console.anthropic.com/settings/keys](https://console.anthropic.com/settings/keys).
2. Click **Create Key**.
3. Give it a name like "Fleet".
4. Copy the key (it starts with `sk-ant-`).
5. Save it somewhere safe, you'll need it in Step 2.
Both services charge based on usage.
## 2. Add your API key to LangSmith
Now you'll add your API key to LangSmith so your agents can use it:
1. Go to [smith.langchain.com](https://smith.langchain.com?utm_source=docs\&utm_medium=cta\&utm_campaign=langsmith-signup\&utm_content=langsmith-fleet-quickstart).
2. Click the **Settings** icon in the bottom left.
Click the **Secrets** tab at the top.
1. Click **Add secret**.
2. For **Key**, enter:
* `OPENAI_API_KEY` (if using OpenAI)
* `ANTHROPIC_API_KEY` (if using Anthropic)
3. For **Value**, paste the API key you copied in Step 1.
4. Click **Save secret**.
Your agent now has access to an AI model to understand and respond to your requests. Next, you'll create your agent.
## 3. Create your agent
1. In the [LangSmith UI](https://smith.langchain.com?utm_source=docs\&utm_medium=cta\&utm_campaign=langsmith-signup\&utm_content=langsmith-fleet-quickstart), click **Switch to Fleet** at the top of the left-hand navigation.
1. Select **Templates** in the left-hand navigation.
2. Select **Email Assistant** template.
3. Click **Use this template**.
If you don't want to start with a template, you have two other options. From the **+ New Agent** page:
* **Chat**: Use the chat interface to describe your agent, and it will help you create it step-by-step.
* **Manually**: Select **Create manually instead** to build your agent without any pre-filled responses on the configuration page.
Your agent will ask you to connect your Google accounts:
1. Click **Connect**.
2. Sign in with your Google account.
3. Review permissions and click **Allow**.
4. You'll be redirected back to LangSmith where your agent will be created.
Your agent only accesses your accounts when working on tasks you give it. You can revoke access anytime in your Google account settings.
## 4. View the agent template
At this point, you can review the template instructions for the email assistant. If needed, you can make adjustments to the instructions.
If you made any changes, click **Save changes**.
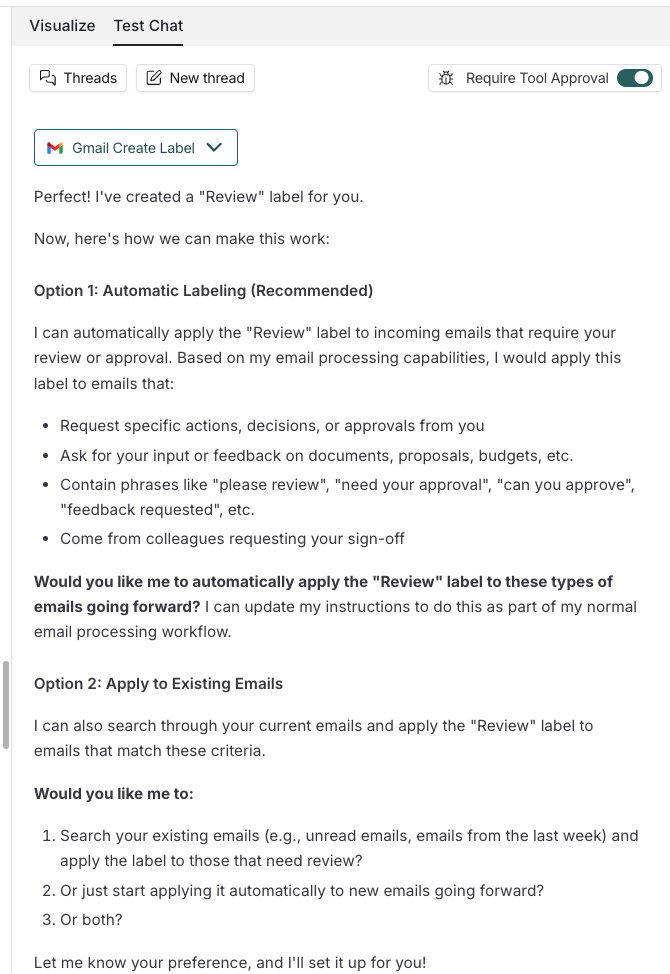
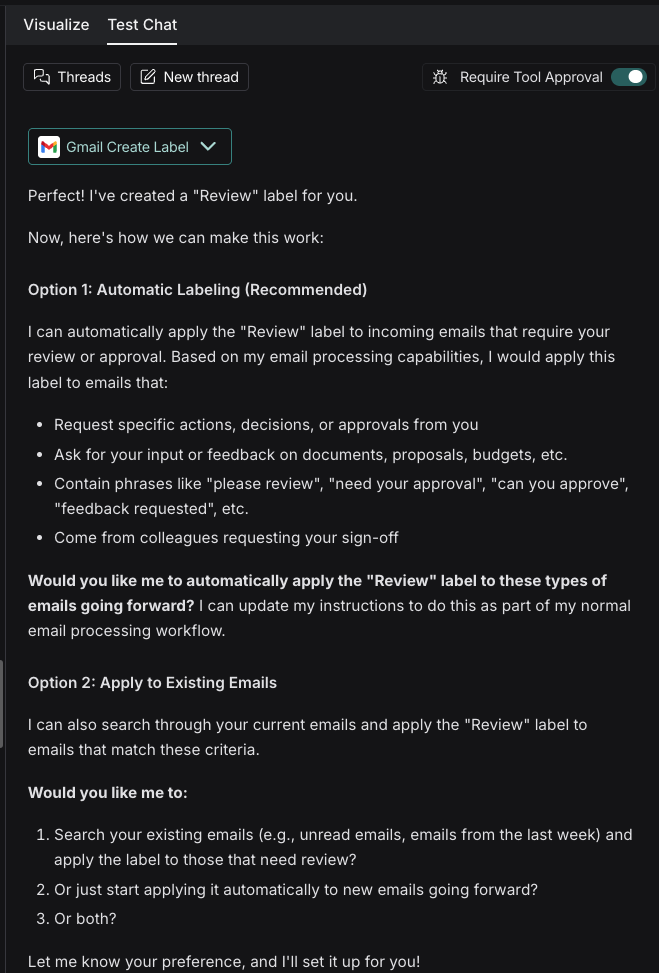
1. In the right-hand panel of the configuration page, select the **Test Chat** tab.
2. Try out the email assistant in the chat interface, for example:
> *Apply a "Review" label to emails that I receive, which require some kind of review from me*
Your agent will start work and provide a **Continue** option for each step that requires your approval.
 3. As you test out the agent, you can make edits to the instructions, or add tools that you may need. Click **Save changes** when you're happy with the results.
## Edit your agent
You may want to update your agent's instructions or include more tools. You can directly chat with your agent to ask for updates, or you can:
1. From **My Agents** in the left-hand navigation, select the agent you want to edit.
2. Select **Edit Agent**.
From the agent's edit page, you can:
* Add tools with **+ Add tool** to connect more apps and services like Slack, GitHub, or Linear.
* Add further helpers with **+ Add sub-agent** to break complex tasks into specialized sub-tasks.
* Request pauses for reviews on existing tools.
* Modify existing tools.
* Explore channels that can start your agent automatically.
## Next steps
Now that you've created your first agent, here's what to explore:
Explore prebuilt agents for common tasks
Run your agent automatically with channels (Slack, email, schedules)
Add Slack, GitHub, Linear, and more
Use sub-agents to break down big tasks
***
3. As you test out the agent, you can make edits to the instructions, or add tools that you may need. Click **Save changes** when you're happy with the results.
## Edit your agent
You may want to update your agent's instructions or include more tools. You can directly chat with your agent to ask for updates, or you can:
1. From **My Agents** in the left-hand navigation, select the agent you want to edit.
2. Select **Edit Agent**.
From the agent's edit page, you can:
* Add tools with **+ Add tool** to connect more apps and services like Slack, GitHub, or Linear.
* Add further helpers with **+ Add sub-agent** to break complex tasks into specialized sub-tasks.
* Request pauses for reviews on existing tools.
* Modify existing tools.
* Explore channels that can start your agent automatically.
## Next steps
Now that you've created your first agent, here's what to explore:
Explore prebuilt agents for common tasks
Run your agent automatically with channels (Slack, email, schedules)
Add Slack, GitHub, Linear, and more
Use sub-agents to break down big tasks
***
[Connect these docs](/use-these-docs) to Claude, VSCode, and more via MCP for real-time answers.
[Edit this page on GitHub](https://github.com/langchain-ai/docs/edit/main/src/langsmith/fleet/quickstart.mdx) or [file an issue](https://github.com/langchain-ai/docs/issues/new/choose).