

This setup is for development purposes. For production deployment, you’ll need
to adjust URLs and create separate GitHub Apps for production use.
Prerequisites
Before starting, ensure you have the following installed:- Node.js (version 18 or higher)
- Yarn (version 3.5.1 or higher)
- Git
Setup Steps
1
Clone the Repository
Clone the Open SWE repository to your local machine:
2
Install Dependencies
Install all dependencies using Yarn from the repository root:This will install dependencies for all packages in the monorepo workspace.
3
Set Up Environment Files
Copy the environment example files and configure them:Web App Environment Variables (
Fill in the following variables (GitHub App values will be added in the next step):Agent Environment Variables (
Configure the agent environment variables:If you don’t set the
Web App Environment Variables (apps/web/.env)
Fill in the following variables (GitHub App values will be added in the next step):Environment Variables
Agent Environment Variables (apps/open-swe/.env)
Configure the agent environment variables:Environment Variables
NEXT_PUBLIC_ALLOWED_USERS_LIST environment variable, every user will be required to set their own LLM API keys to use the agent. Additionally, none of the webhook features (triggering new runs by adding labels to GitHub issues, tagging the agent in PR reviews, etc.) will work unless you include the username’s of the GitHub users you want to allow access to in the NEXT_PUBLIC_ALLOWED_USERS_LIST environment variable (in both web and agent deployments).Generate the
SECRETS_ENCRYPTION_KEY using: openssl rand -hex 32. This key must be identical in both environment files.4
Create GitHub App
You’ll need to create a GitHub App (not a GitHub OAuth App). These are different types of applications with different capabilities. Consider creating separate GitHub apps for development and production environments.
Create the GitHub App
- Go to GitHub App creation page
- Fill in the basic information:
- GitHub App name: Your preferred name
- Description: Development instance of Open SWE coding agent
- Homepage URL: Your repository URL
- Callback URL:
http://localhost:3000/api/auth/github/callback
Configure OAuth Settings
- ✅ Request user authorization (OAuth) during installation - Allows users to log in to the web app
- ✅ Redirect on update - Redirects users back to your app after permission updates
- ❌ Expire user authorization tokens - Keep tokens from expiring
Set Up Webhook
- ✅ Enable webhook
-
Webhook URL: You’ll need to use a tool like ngrok to expose your local server:
Use the ngrok URL +
/webhooks/github(e.g.,https://abc123.ngrok.io/webhooks/github) -
Webhook secret: Generate and save this value:
Add this value to
GITHUB_WEBHOOK_SECRETinapps/open-swe/.env
Configure Permissions
Repository permissions:- Contents: Read & Write
- Issues: Read & Write
- Pull requests: Read & Write
- Metadata: Read only (automatically enabled)
Subscribe to Events
- ✅ Issues - Required for webhook functionality
- ✅ Pull request review - Required for PR tagging functionality
- ✅ Pull request review comment - Required for PR tagging functionality
- ✅ Issue comment - Required for PR tagging functionality
Installation Settings
- Where can this GitHub App be installed?:
- Choose “Any account” for broader testing
- Or “Only on this account” to limit to your repositories
Complete App Creation
Click Create GitHub App to finish the setup.Collect App Credentials
After creating the app, collect the following values and add them to both environment files:- GITHUB_APP_NAME: The name you chose
- GITHUB_APP_ID: Found in the “About” section (e.g.,
12345678) - NEXT_PUBLIC_GITHUB_APP_CLIENT_ID: Found in the “About” section
- GITHUB_APP_CLIENT_SECRET:
- Scroll to “Client secrets” section
- Click “Generate new client secret”
- Copy the generated value
- GITHUB_APP_PRIVATE_KEY:
- Scroll to “Private keys” section
- Click “Generate a private key”
- Download the
.pemfile and copy its contents - Format as a single line with
\\nfor line breaks, or use the multiline format shown in the example
- GITHUB_APP_REDIRECT_URI: Should be
http://localhost:3000/api/auth/github/callbackfor local development, orhttps://your-production-url.com/api/auth/github/callbackfor production. - GITHUB_WEBHOOK_SECRET: Generate and save this value:
Add this value to
GITHUB_WEBHOOK_SECRETinapps/open-swe/.envandapps/web/.env.
GitHub App OAuth Settings
GitHub App OAuth Settings
The following screenshots show where to find the following values: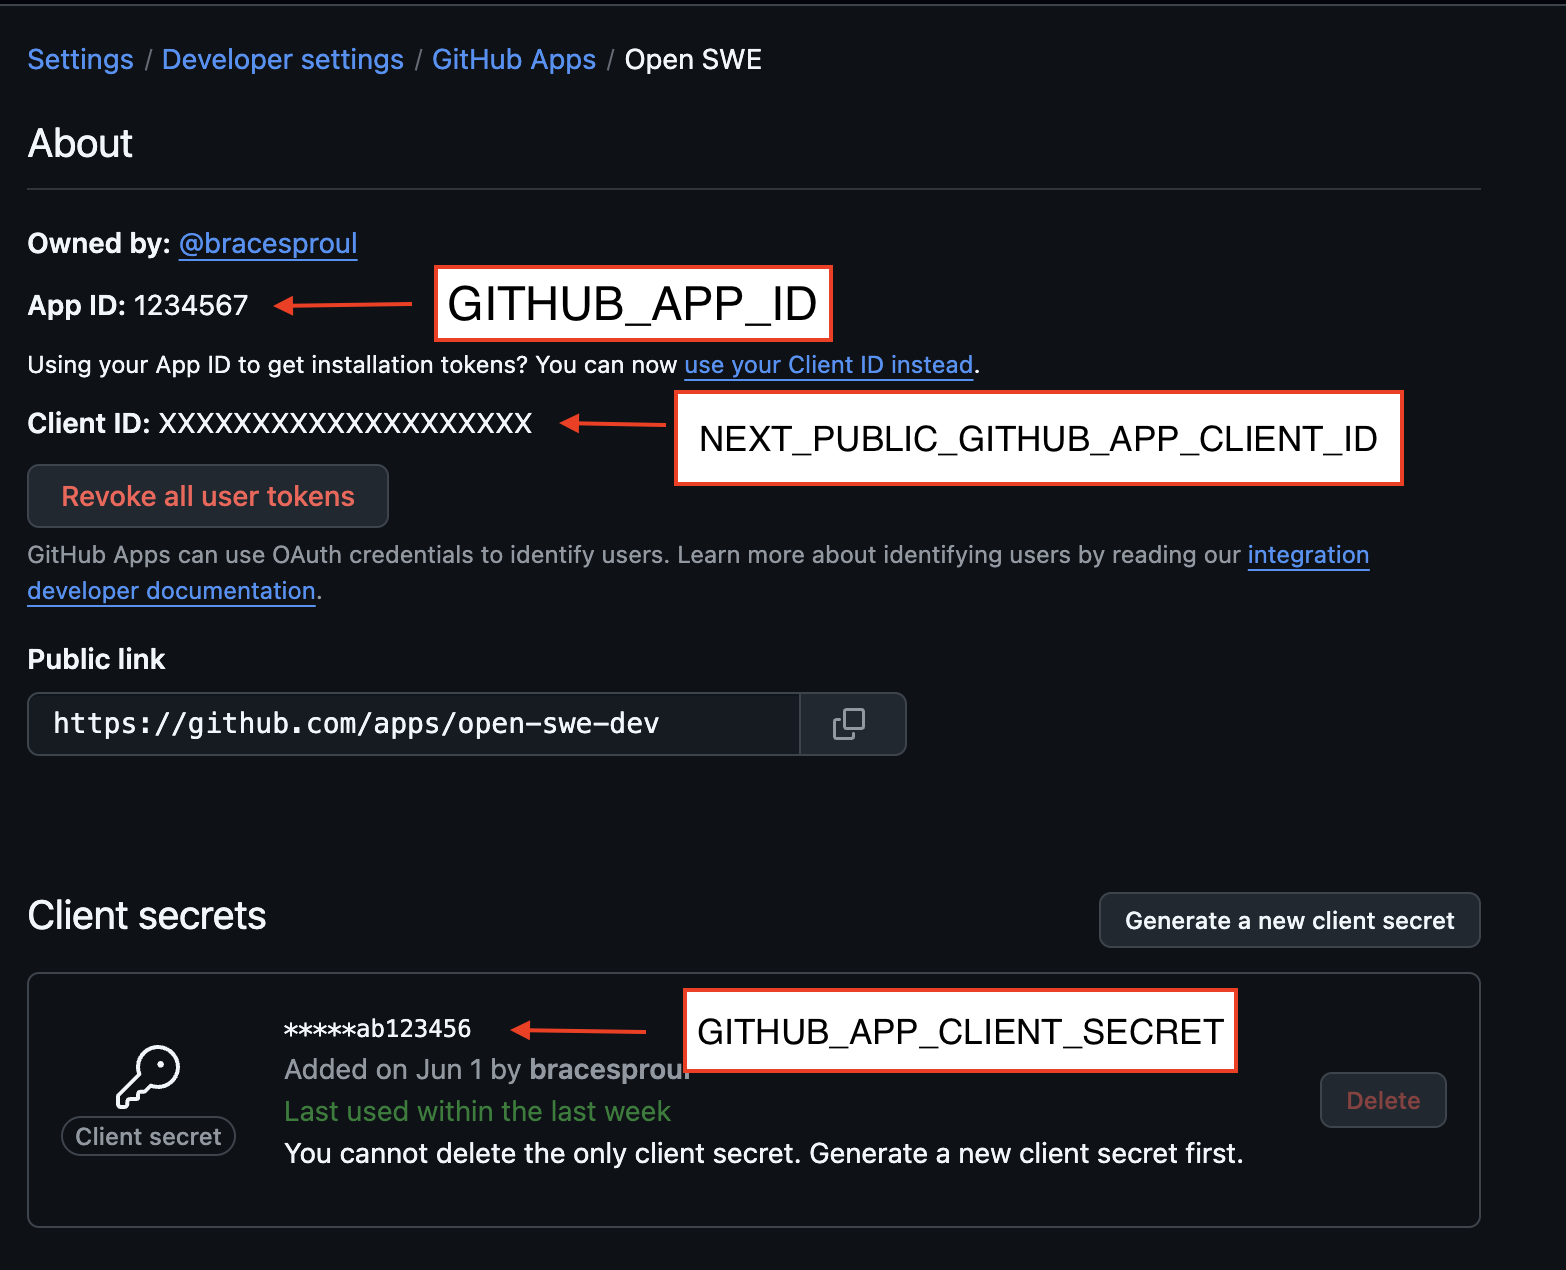
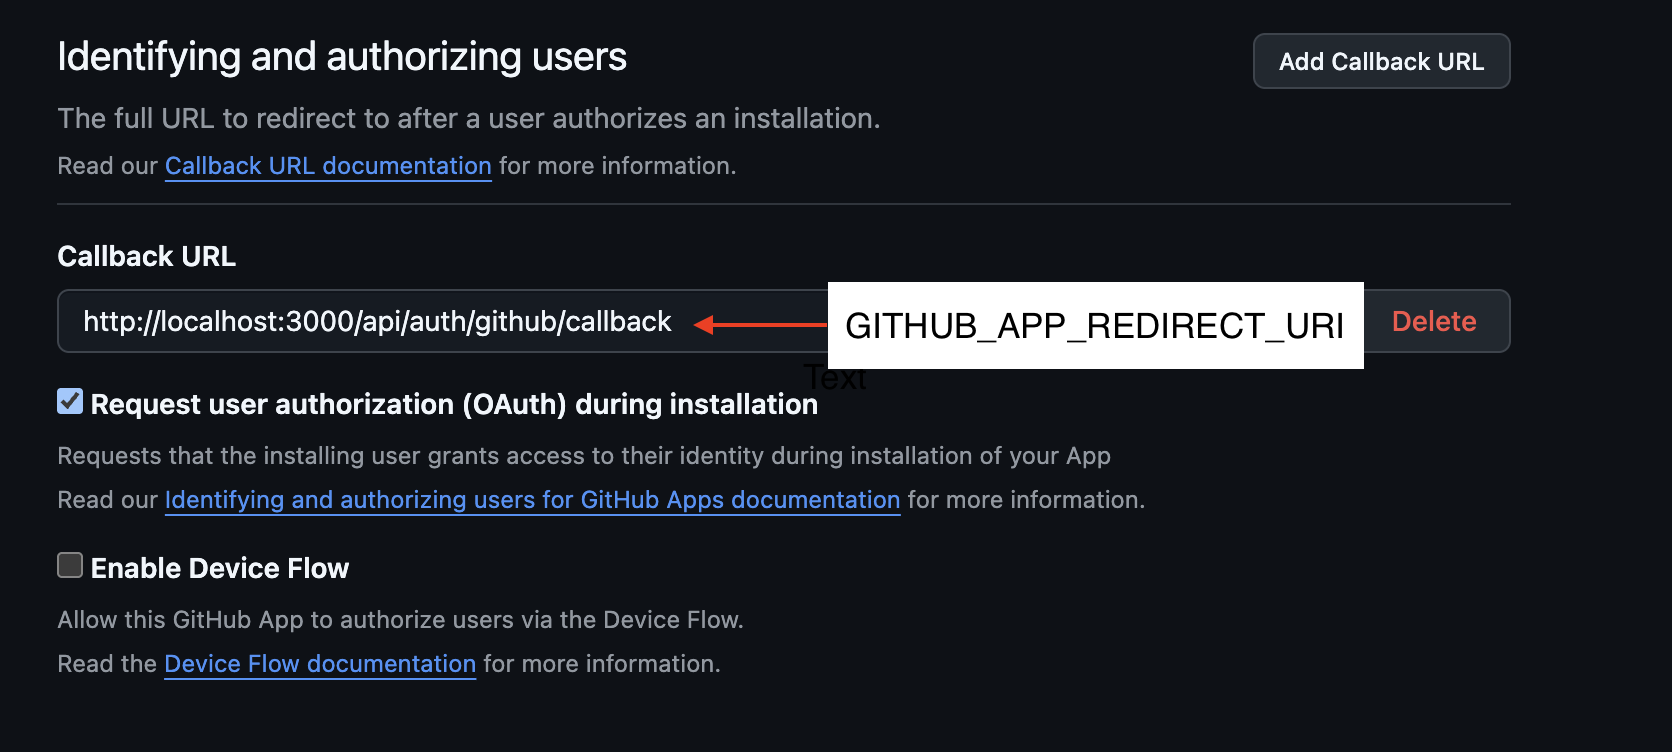
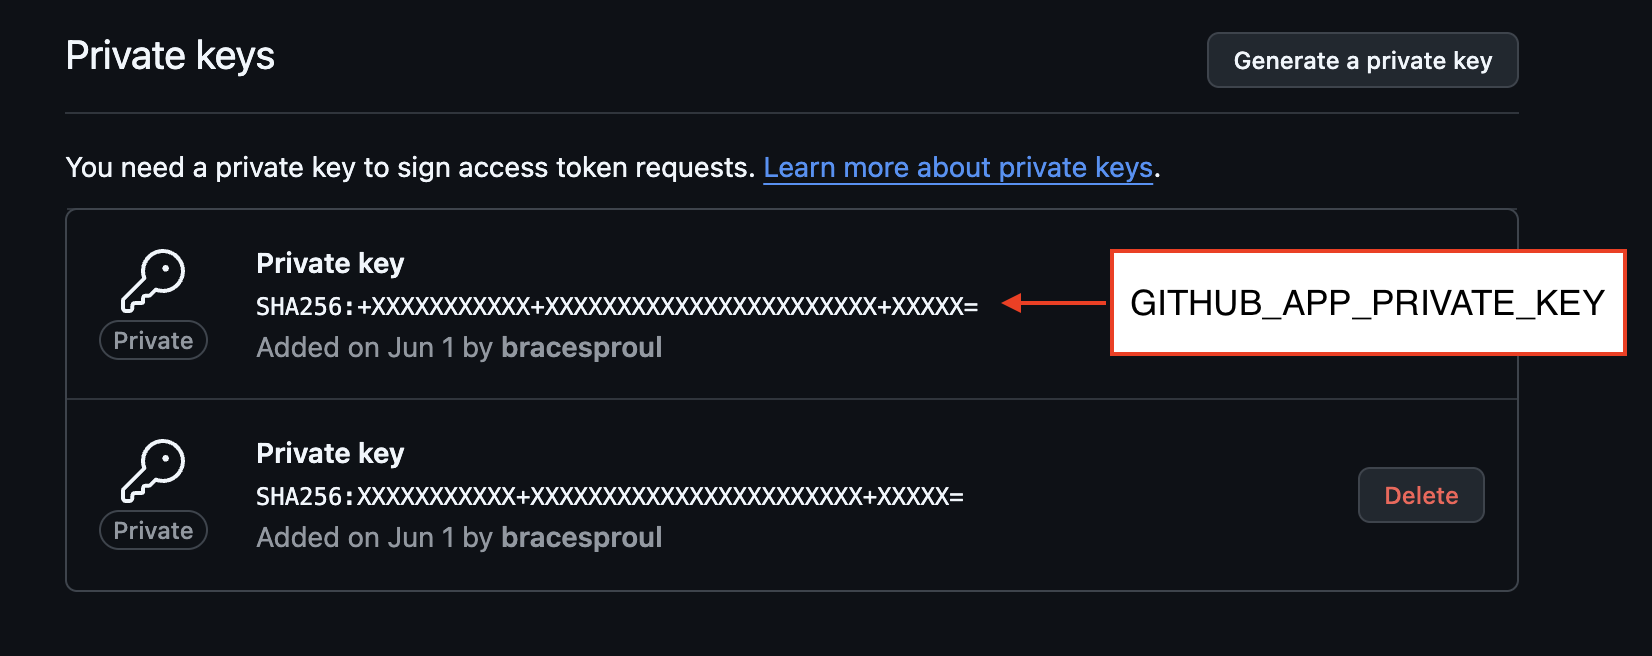
GITHUB_APP_IDNEXT_PUBLIC_GITHUB_APP_CLIENT_IDGITHUB_APP_CLIENT_SECRETGITHUB_APP_REDIRECT_URIGITHUB_APP_PRIVATE_KEY
Keep your GitHub App credentials secure and never commit them to version control. The
.env files are already included in .gitignore.5
Start Development Servers
With all environment variables configured, start both development servers:Terminal 1 - Start the LangGraph Agent:This starts the LangGraph server at This starts the Next.js web app at
http://localhost:2024Terminal 2 - Start the Web Application:http://localhost:3000Both servers need to be running simultaneously for full functionality. The web app communicates with the LangGraph agent through API calls.
Verification
Once both servers are running:- Visit the web app: Navigate to
http://localhost:3000 - Test GitHub authentication: Try logging in with your GitHub account
If you encounter issues, check the console logs in both terminal windows for
error messages. Common issues include missing environment variables or
incorrect GitHub App configuration.
Next Steps
- Learn about Authentication to understand how the GitHub App integration works
- Explore Usage to start using Open SWE for code changes
- Review the Monorepo Structure for development best practices