

langgraph deploy command. Any app that exports a graph from a langgraph.json config deploys the same way, regardless of which framework you used to author the agent.
The
langgraph deploy command is in beta. On LangSmith Cloud (SaaS) in AWS, local builds require langgraph-cli 0.4.35 or later.Prerequisites
Before you begin, ensure you have:- A LangSmith account on the Plus plan or above and an API key.
-
(Optional) Docker installed and the Docker daemon running for local builds. Not required for remote builds. Install Docker Desktop. If Docker is not available,
langgraph deploytriggers a remote build automatically. -
(Optional) On Apple Silicon (M1/M2/M3): Docker Buildx for cross-compiling to
linux/amd64during local builds. -
The LangGraph CLI:
1. Create a deployable app
langgraph deploy deploys any project whose langgraph.json exports a graph. Pick the path that matches how you author your agent:
- LangGraph template
- Bring your own framework
Create a new app from the
new-langgraph-project-python template:2. Set your API key
Add your LangSmith API key to a.env file in your project root:
langgraph deploy command reads this automatically. Alternatively, pass it inline:
3. Deploy
Deploy directly from the CLI or via the UI.- Deploy from CLI
- Deploy from Studio
Run the deploy command from your project directory:This creates a Serverless deployment named after your project directory. Use
--name to change the name, or --deployment-type dedicated for a Dedicated deployment.You can also use langgraph deploy list to see all deployments, langgraph deploy logs to tail runtime logs, and langgraph deploy delete <ID> to remove a deployment. For details, refer to the CLI reference.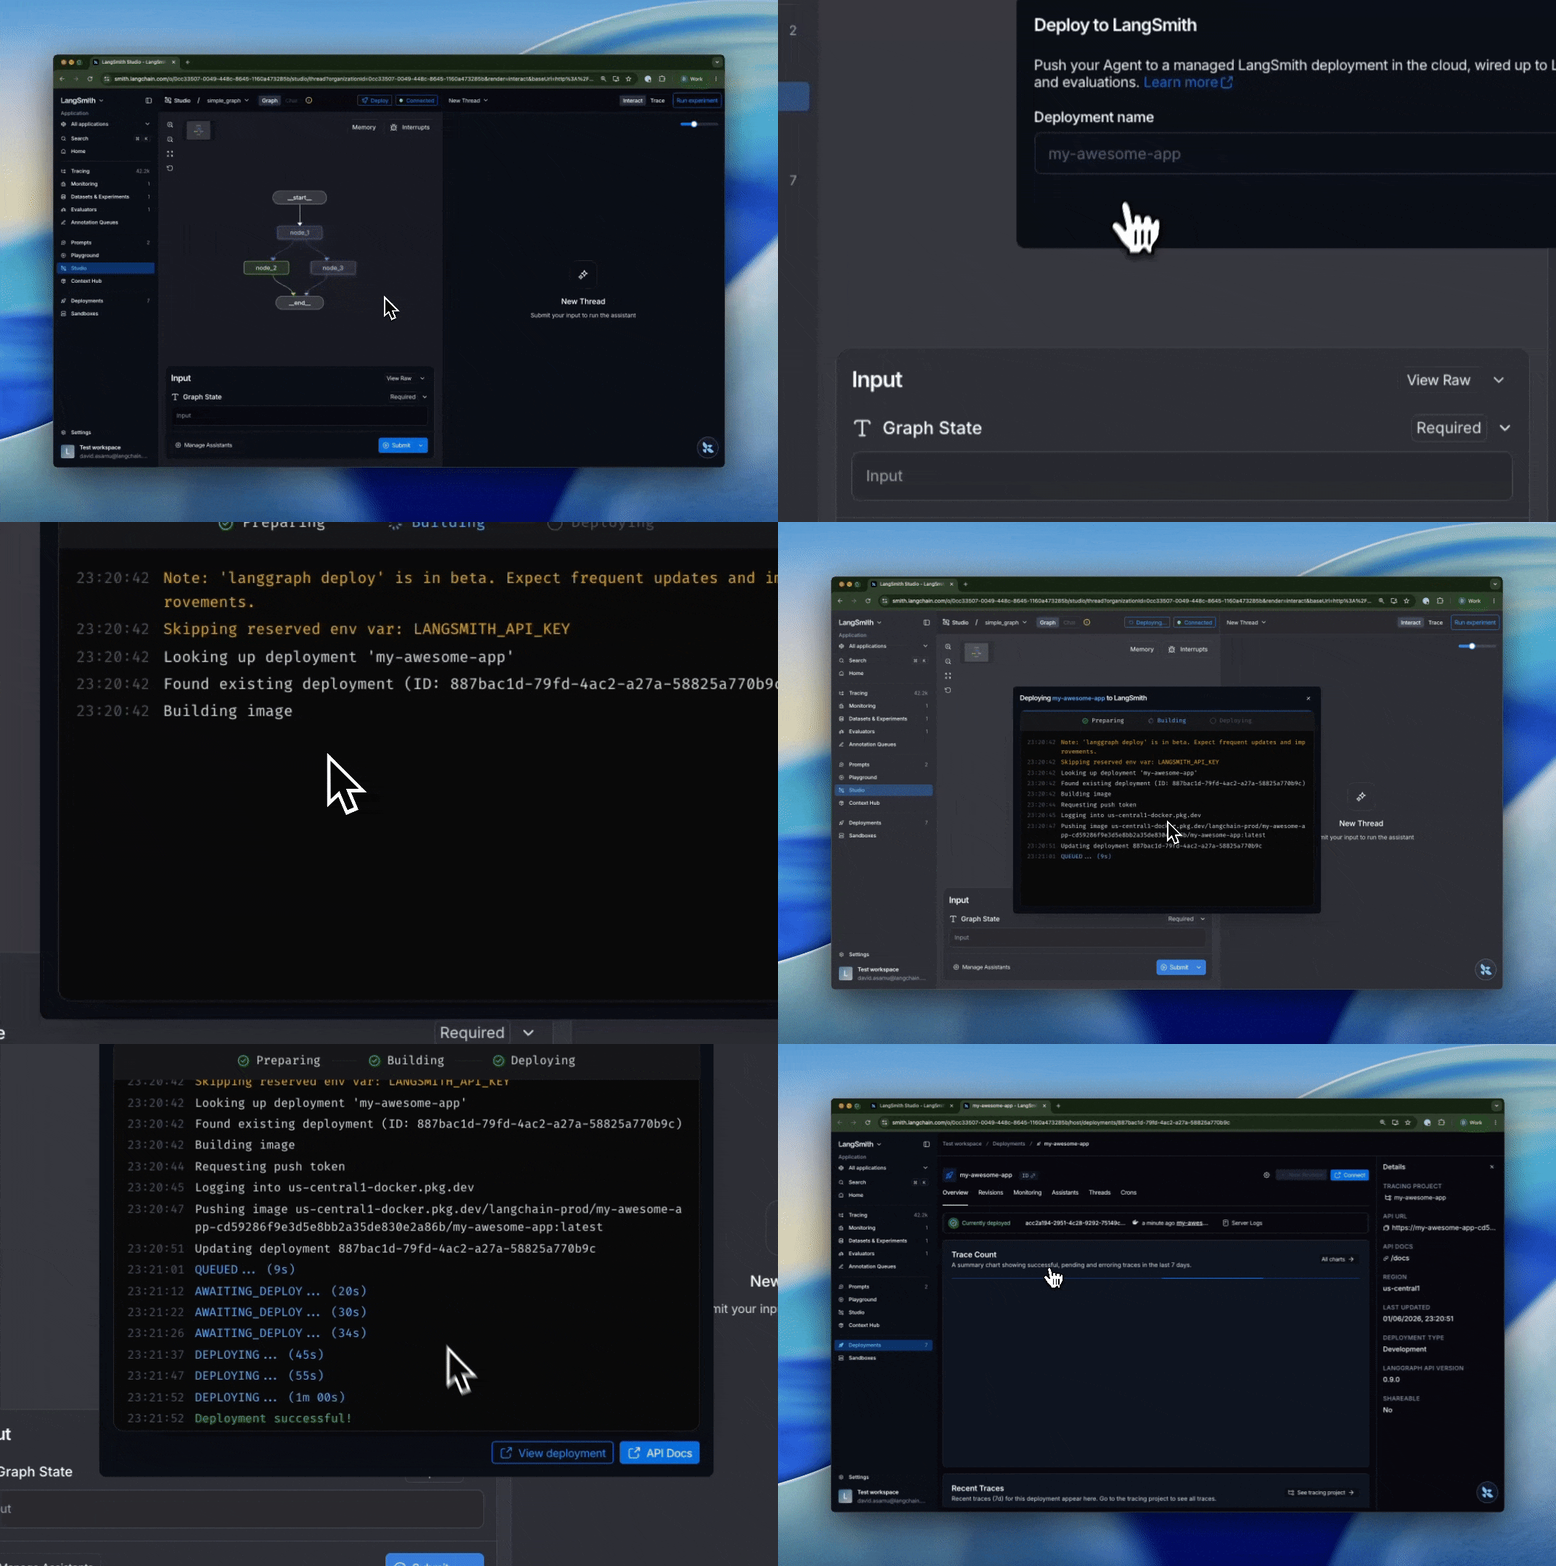
4. Test in Studio
Studio is an interactive agent IDE connected directly to your deployment. Use it to send messages, inspect intermediate state at each node, edit state mid-run, and replay from any prior checkpoint without writing code. Once the deployment is ready:- Go to LangSmith and select Deployments in the left sidebar.
- Select your deployment to view its details.
- Click Studio in the top right corner to open Studio.
5. Test the API
Copy the API URL from the deployment details view, then use it to call your application:- Python SDK (Async)
- Python SDK (Sync)
- JavaScript SDK
- Rest API
- Install the LangGraph Python SDK:
- Send a message to the assistant (stateless run):
Next steps
Assistants
Deploy the same graph with different models, prompts, or tools per assistant.
Threads
Persist state across multiple runs so your agent remembers context between interactions.
Runs
Kick off background runs for long-running jobs and stream results back to your client.
Connect these docs to your agent of choice via MCP for real-time answers.