

You can also manage annotation queues and feedback configs programmatically with the SDK. Refer to Manage feedback & annotation queues programmatically.
- Single-run annotation queues present one queue item at a time, either a run or a thread, and let reviewers submit any rubric feedback you configure. For run items, single-run queues also support assertions to capture acceptance criteria for offline evaluation.
- Pairwise annotation queues (PAQs) present two runs side-by-side so reviewers can quickly decide which output is better (or if they are equivalent) against the rubric items you define.
Single-run annotation queues
Single-run queues present one item at a time and let reviewers submit any rubric feedback you configure. They can be created directly from the Annotation queues section in the LangSmith UI. A queue can contain a mix of run items and thread items. A thread item represents an entire conversation and is reviewed against the same rubric as a run item. Run items and thread items support different capabilities:Create a single-run queue
- Navigate to Annotation Queues in the left navigation.
- Click + Annotation Queue in the top-left corner to open the Create Annotation Queue panel.
Basic details
- Fill in the Name and Description of the queue.
- Optionally select an Application.
- Optionally Select a default dataset to streamline exporting reviewed runs into a dataset in your LangSmith workspace. Default datasets apply when you use Add to Dataset on run items; thread items do not support adding to a dataset.
Annotation rubric
- Draft some high-level Instructions for your annotators, which will be shown in the sidebar on every item.
- Click + Add a feedback rubric to add feedback keys to your annotation queue. Annotators will be presented with these feedback keys on each item.
- Add a description for each, as well as a short description of each category, if the feedback type is categorical. Reviewers see the Instructions and Feedback details in the right-hand pane of the UI.
Collaborator settings
Set a number of reviewers or the maximum time you want to reserve the item to a collaborator. When there are multiple annotators for an item, you can choose to have the item stay in the queue until all reviewers have marked it as Done. In these settings, “run” refers to any queue item, including thread items. The settings are as follows:- All workspace members review each run: When enabled, an item remains in the queue until every workspace member has marked their review as Done.
-
Enable reservations on runs: Reserving an item locks it for your review for a set amount of time. While an item is reserved, other reviewers can view it but cannot add feedback or notes. Reservations are disabled if all workspace members review each run.
If a reviewer has viewed an item and then leaves without marking it Done, the reservation will expire after the specified Reservation length. The item is then released back into the queue and can be reserved by another reviewer.
Clicking Requeue for an item’s annotation will only move the current item to the end of the current user’s queue; it won’t affect the queue order of any other user. It will also release the reservation that the current user has on that item.
-
Number of reviewers per run: This determines the number of reviewers that must mark an item as Done for it to be removed from the queue.
- Reviewers cannot view the feedback left by other reviewers.
- Comments on items are visible to all reviewers.
The Number of reviewers per run setting is hidden when Use assigned reviewers is enabled (see below). -
Use assigned reviewers: Enable this toggle to use specific workspace members instead of a count-based threshold. When enabled:
- A multi-select user picker appears so you can choose specific workspace members as assigned reviewers.
- An item is marked Completed only when every assigned reviewer has submitted their review. Queue items progress through three states: Needs Review → Needs Others’ Review → Completed.
- Non-assigned workspace members can still annotate items, but their submissions do not count toward completion.
- Any workspace member can edit the assigned reviewers list in the queue settings.
When you add a new assigned reviewer to a queue that already has completed items, those items do not revert to pending. If you remove an assigned reviewer, any items they had not yet reviewed recalculate their completion status.
Edit a queue’s settings
-
Open the Edit Annotation Queue panel for the annotation queue you want to edit. You can access this panel in two ways:
- In the Annotation queues list, click the Actions icon at the right of the queue’s row. Select Edit from the dropdown.
- In the annotation queue view, click the Settings icon in the top-right corner.
- In the Edit Annotation Queue panel, modify any of the settings you configured during queue creation and click Save.
Assign runs and threads to a single-run queue
There are several ways to populate a single-run queue with items:-
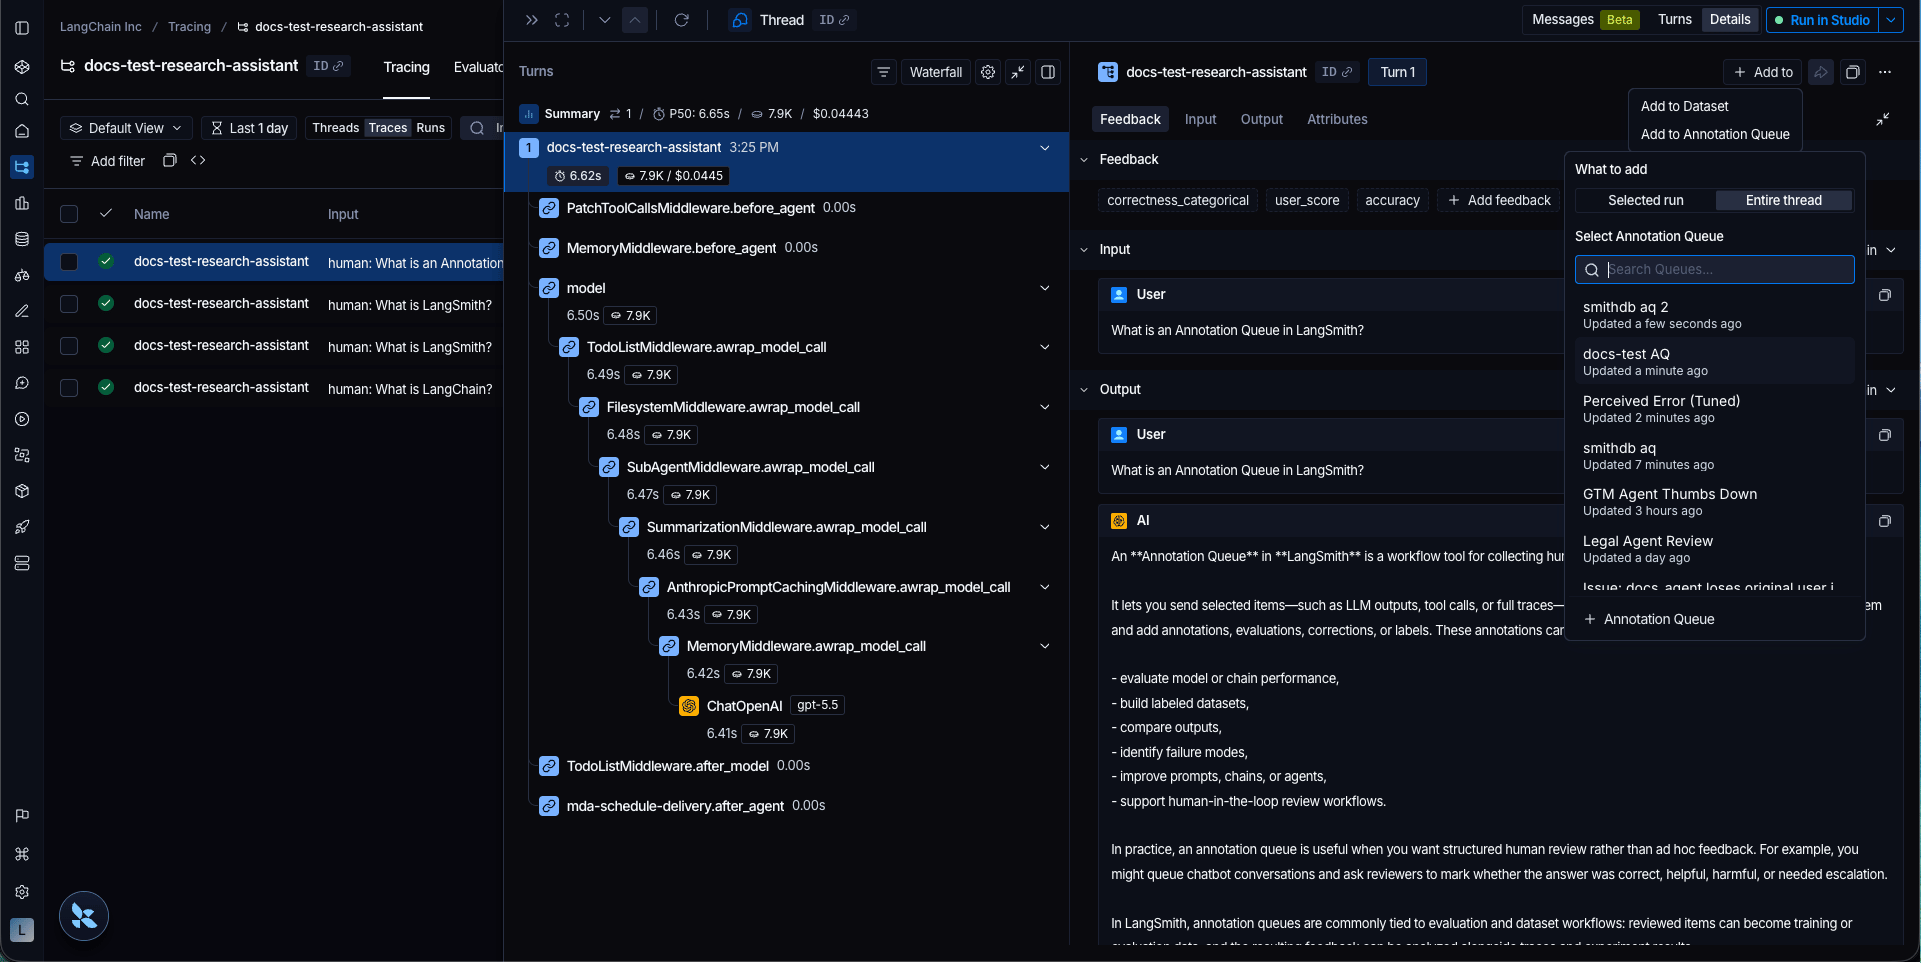
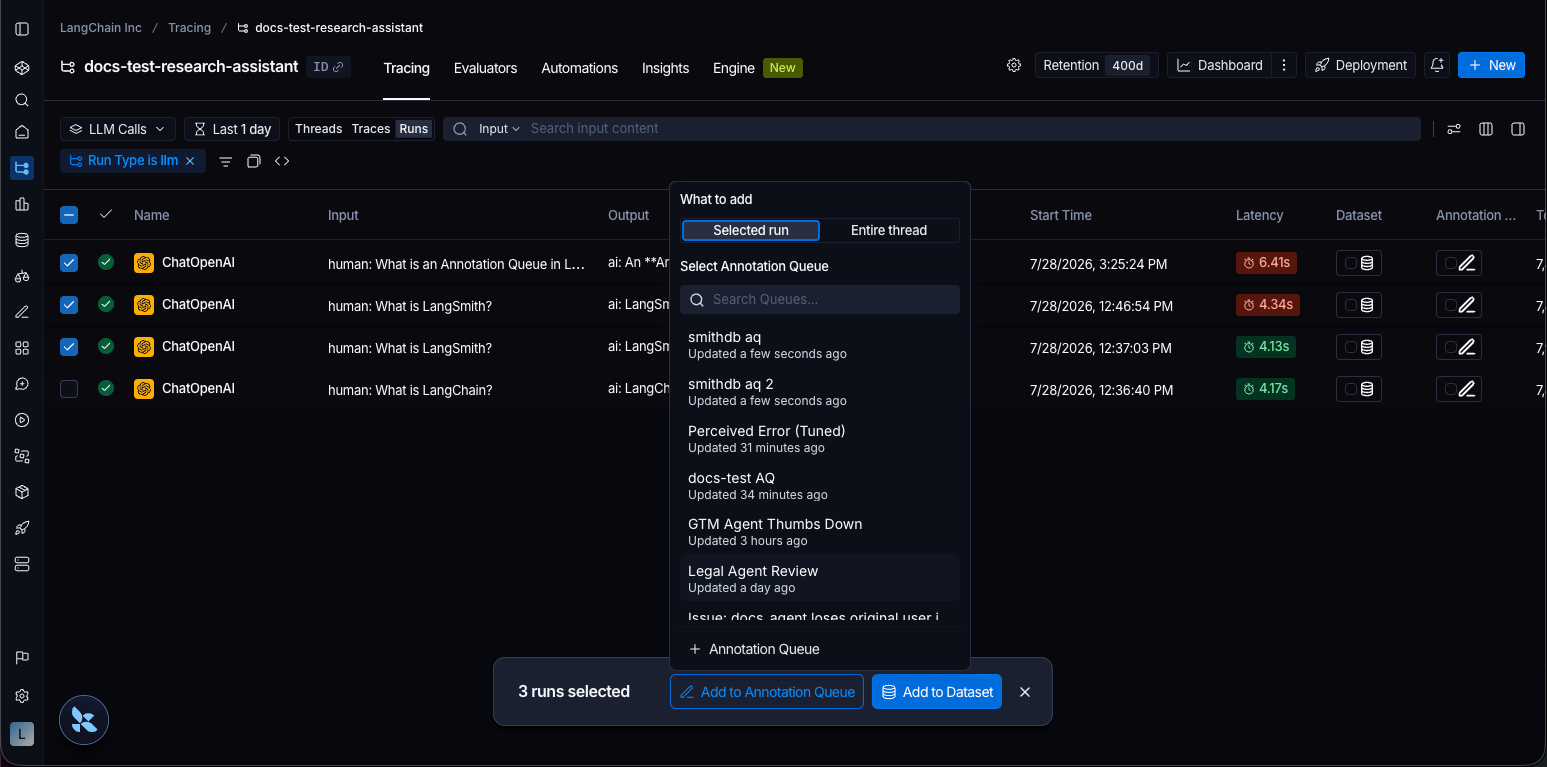
From the Details view: In a tracing project, click into any row to open the side panel in the Details view. Click + Add, then Add to Annotation Queue in the top-right. In the popover, under What to add, choose Selected run (the current run) or Entire thread (the full conversation that run belongs to).
You can add any intermediate run as a run item, but not the root run. Entire thread requires the run to be part of a thread (instrumented with
thread_id/session_idmetadata). If the Entire thread option is unavailable or the Threads tab is empty, the runs are not instrumented with
thread_id/session_idmetadata. -
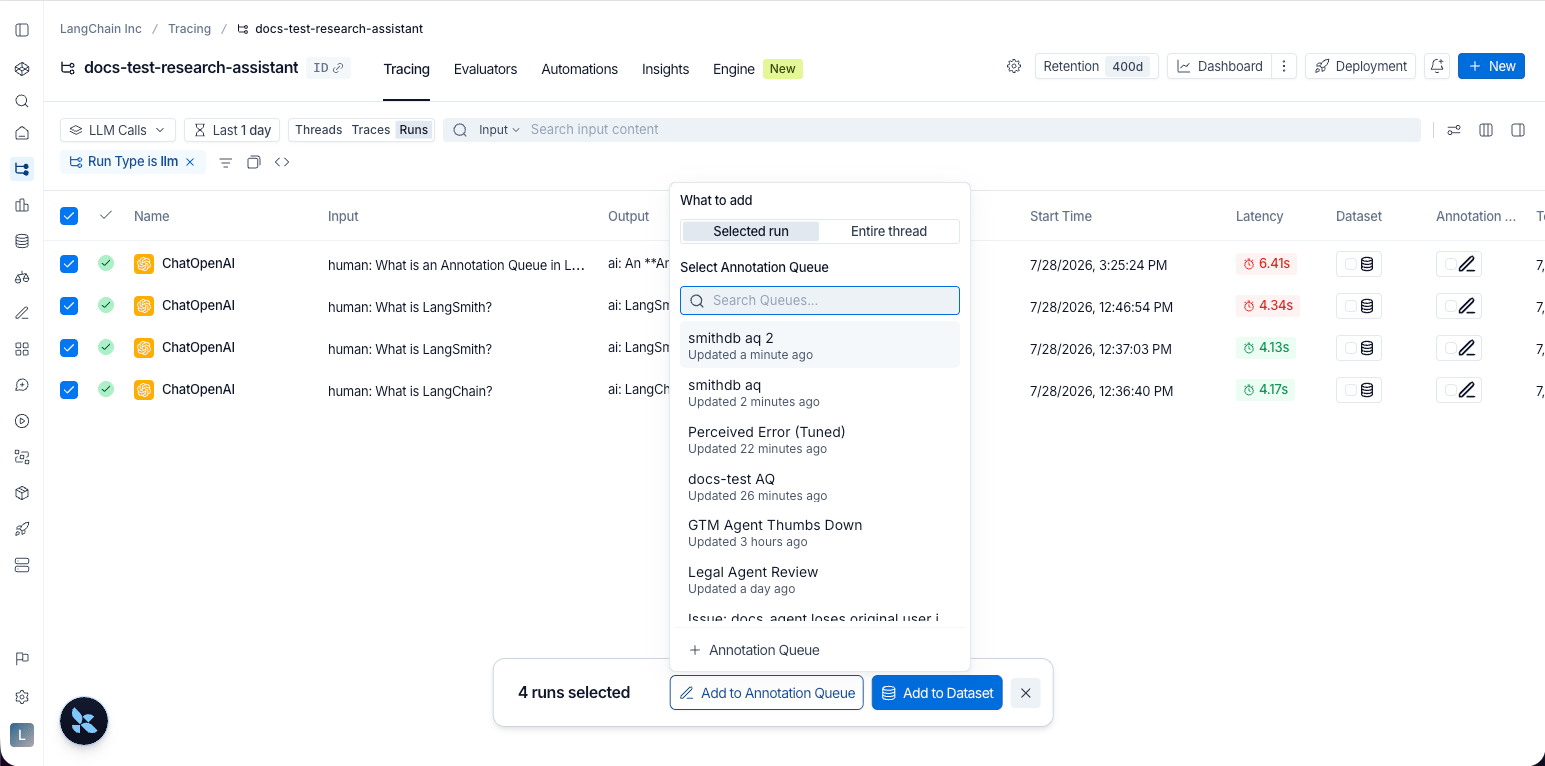
From the Traces or Runs tab: In a tracing project, select either the Traces or Runs tab. Use the row checkboxes to select one or more items. Click Add to Annotation Queue at the bottom of the page. Use What to add to enqueue each selection as a Selected run or as its Entire thread.
-
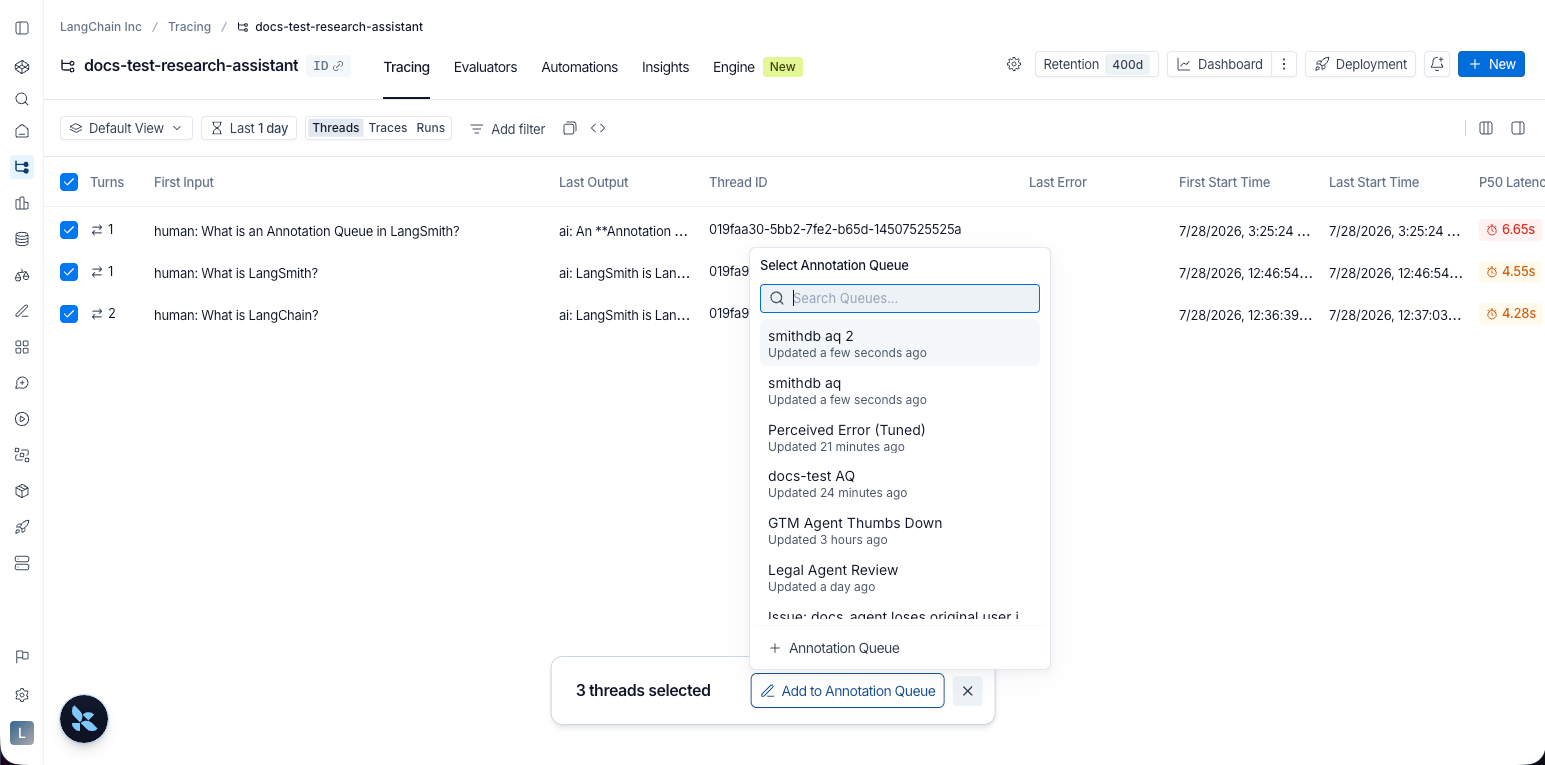
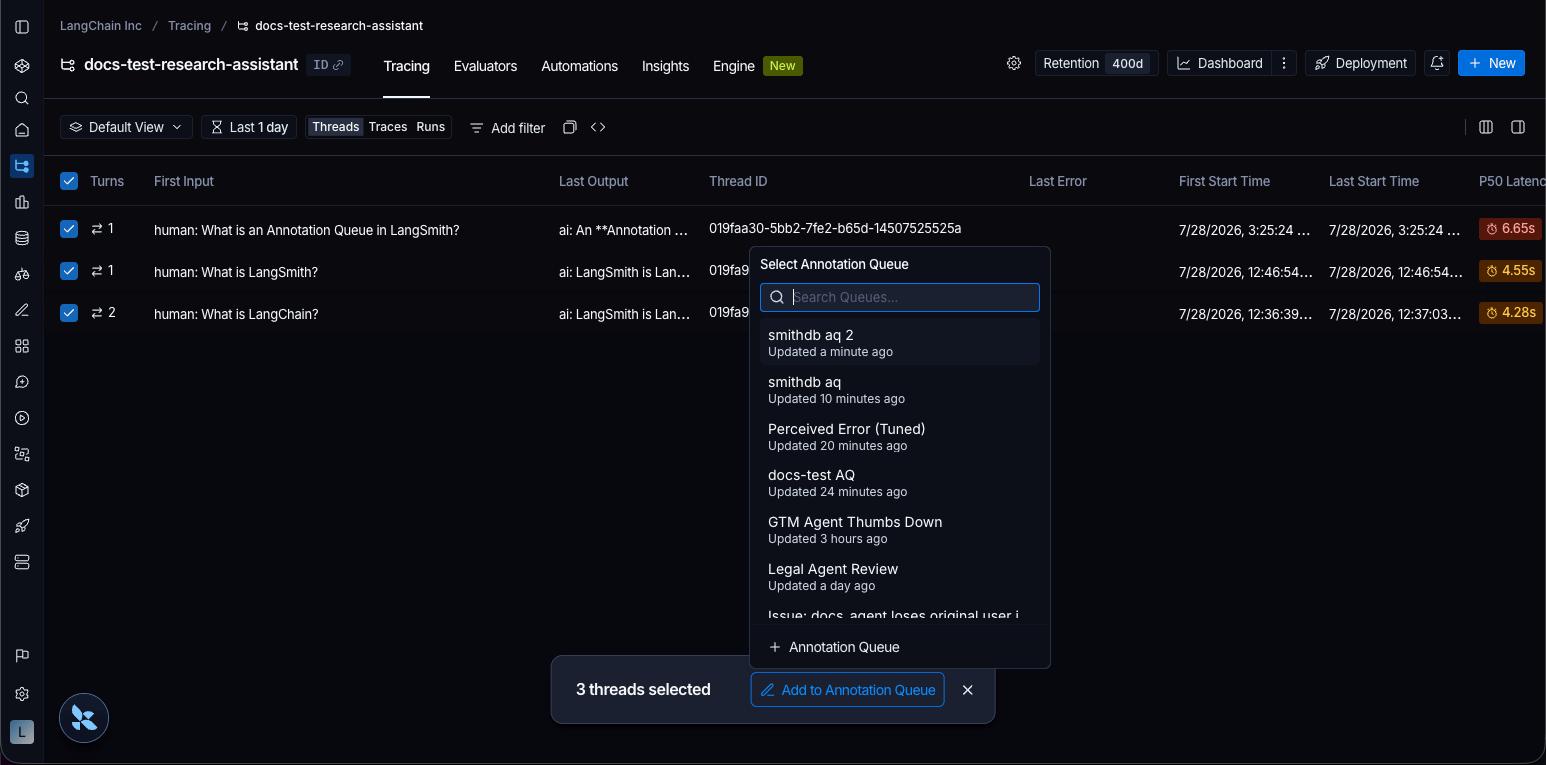
From the Threads tab: In a tracing project, select the Threads tab. Use the row checkboxes to select one or more items. Click Add to Annotation Queue at the bottom of the page. Selected threads are added as thread items.
-
Automation rules: Set up a rule to automatically assign runs that match a filter (for example, errors or low user scores) into a queue.
Automation rules enqueue run items only. They do not add entire threads as thread items.
-
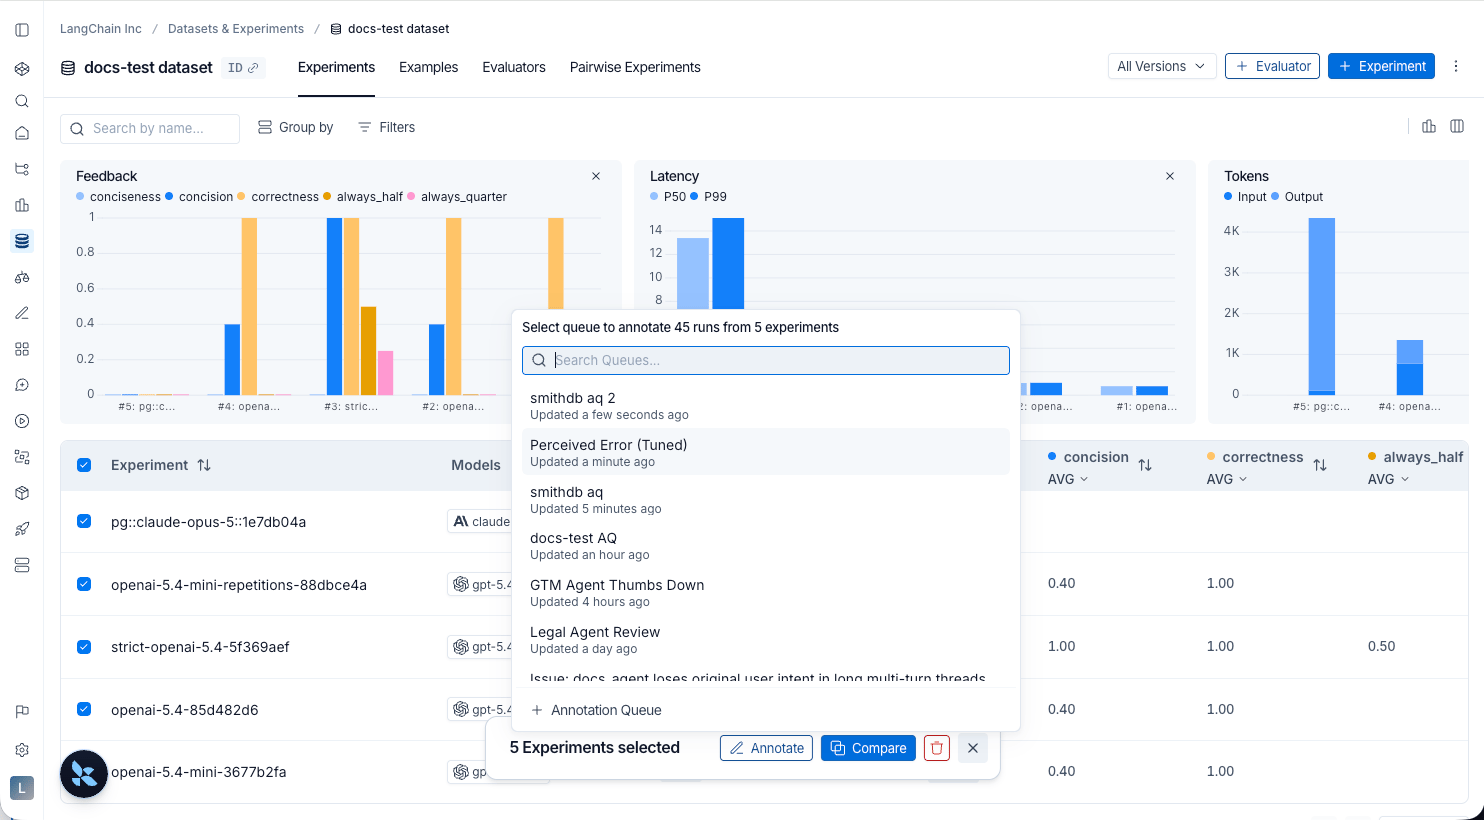
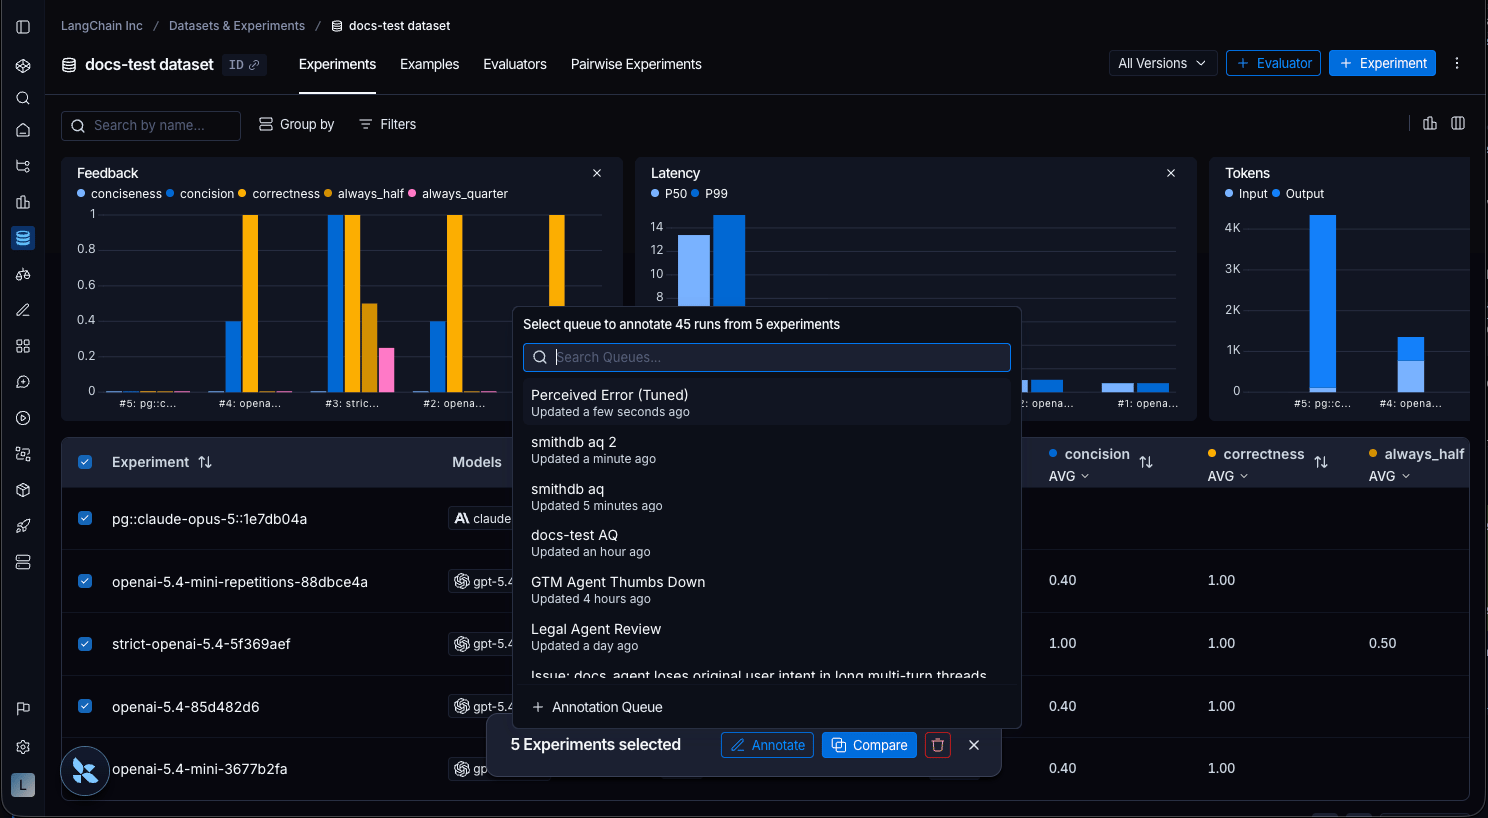
Datasets & Experiments: Select one or more experiments within a dataset and click Annotate. Select Add to Annotation Queue, then choose an existing queue or create a new one. Experiment annotate flows add run items.
You can add at most 100 runs or threads to an annotation queue in a single action. To enqueue more, repeat the add flow in batches of 100 or fewer.Manually adding runs or threads to an annotation queue does not change trace retention by default. The trace keeps the retention configured for its project unless another action explicitly extends retention. For the full retention model, see data retention auto-upgrades.
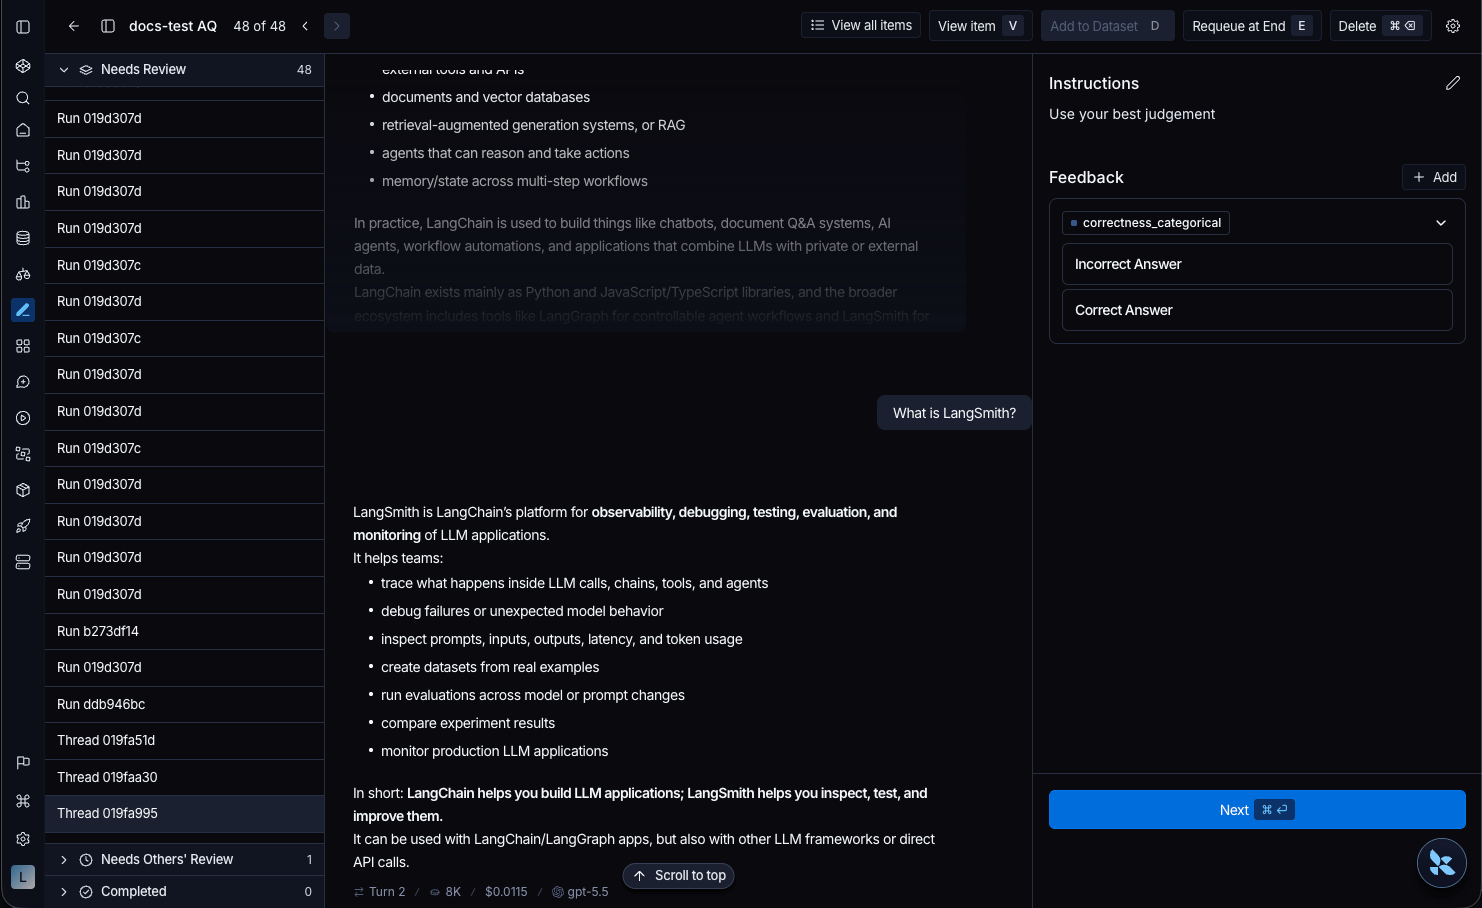
Review a single-run queue
- Navigate to the Annotation Queues section through the left-hand navigation bar. The queue list includes an Assigned Reviewers column showing which reviewers are assigned to each queue. To see only queues assigned to you, click the Assigned to me filter at the top of the list.
- Click on the queue you want to review. This will take you to a focused, cyclical view of the items in the queue that require review. A left side panel lists queue items (runs and threads) and shows the status of each (Needs Review, Needs Others’ Review, Completed). Use View all items to open the full queue list.
-
Review the current item:
- Run items: Inspect inputs and outputs in the center pane. Add Reviewer Notes, score Feedback criteria, or mark the item as reviewed. To build a dataset, edit the run’s input and output to create a corrected reference example and click Add to Dataset. Instead of crafting a corrected reference output by hand, you can write Assertions directly in the review side panel and save them as the example’s expected output.
- Thread items: The center pane shows the conversation transcript for that thread. Read the transcript and score the same rubric Feedback keys. Use View item to open the thread in the conversation peek.
Thread items support rubric feedback only. See the capability table for what differs between run and thread items.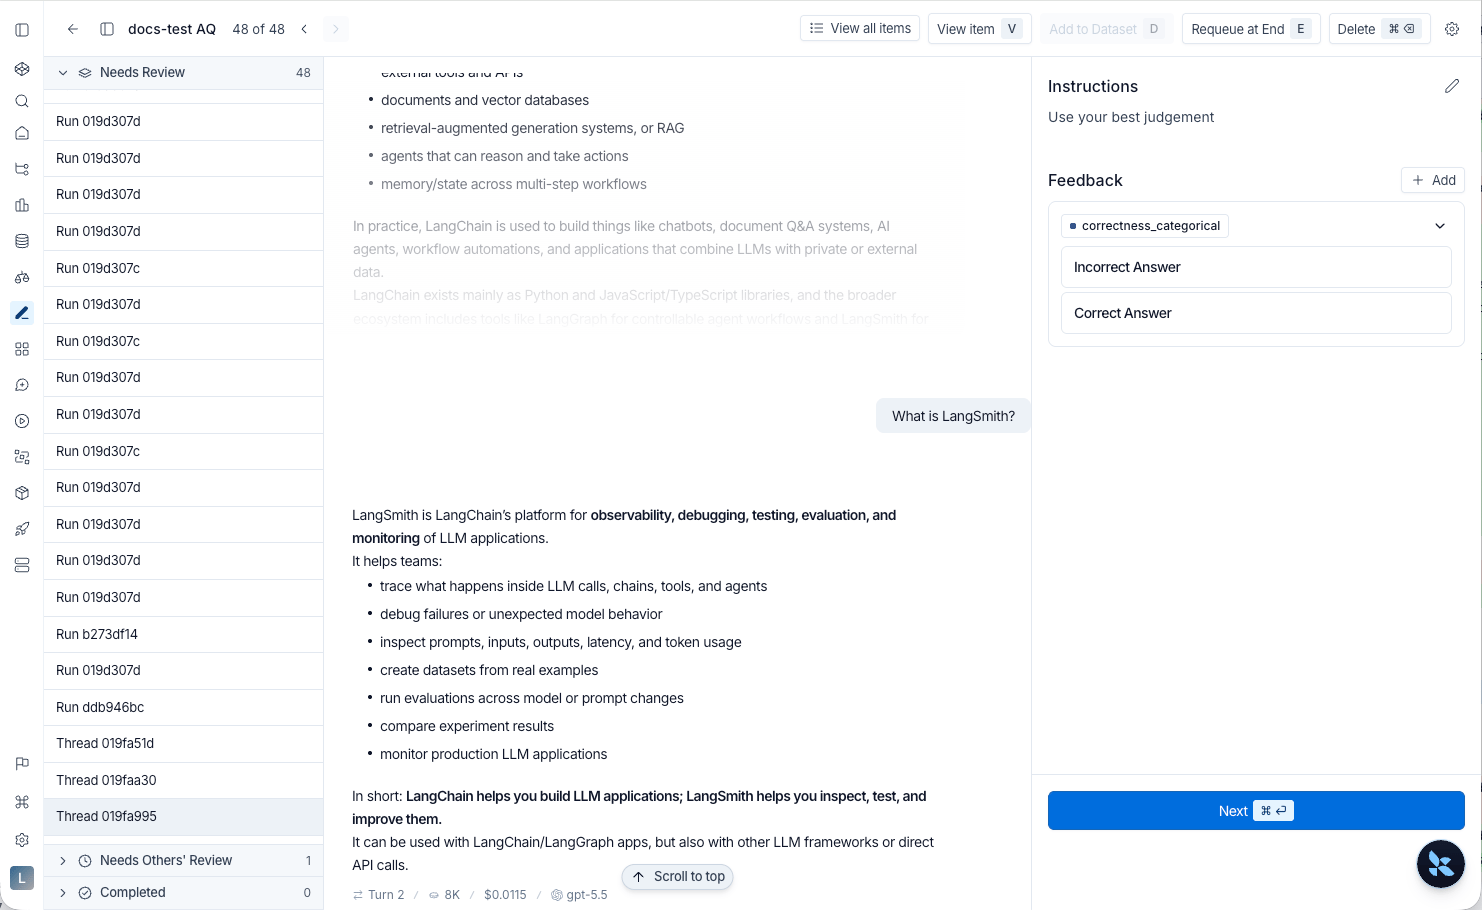
Feedback and notes submitted while reviewing an annotation queue do not change the trace’s retention tier.
Pairwise annotation queues
Pairwise annotation queues (PAQs) present two runs side-by-side so reviewers can quickly decide which output is better (or if they are equivalent) against the rubric items you define. They are designed for fast A/B comparisons between two experiments (often a baseline vs. a candidate model) and must be created from the Datasets & Experiments pages. Pairwise queues use run comparisons only; they do not enqueue thread items.Create a pairwise queue
- Navigate to Datasets & Experiments, open a dataset, and select exactly two experiments you want to compare.
-
Click Annotate. In the popover, choose Add to Pairwise Annotation Queue. (The button is disabled until exactly two experiments are selected.)
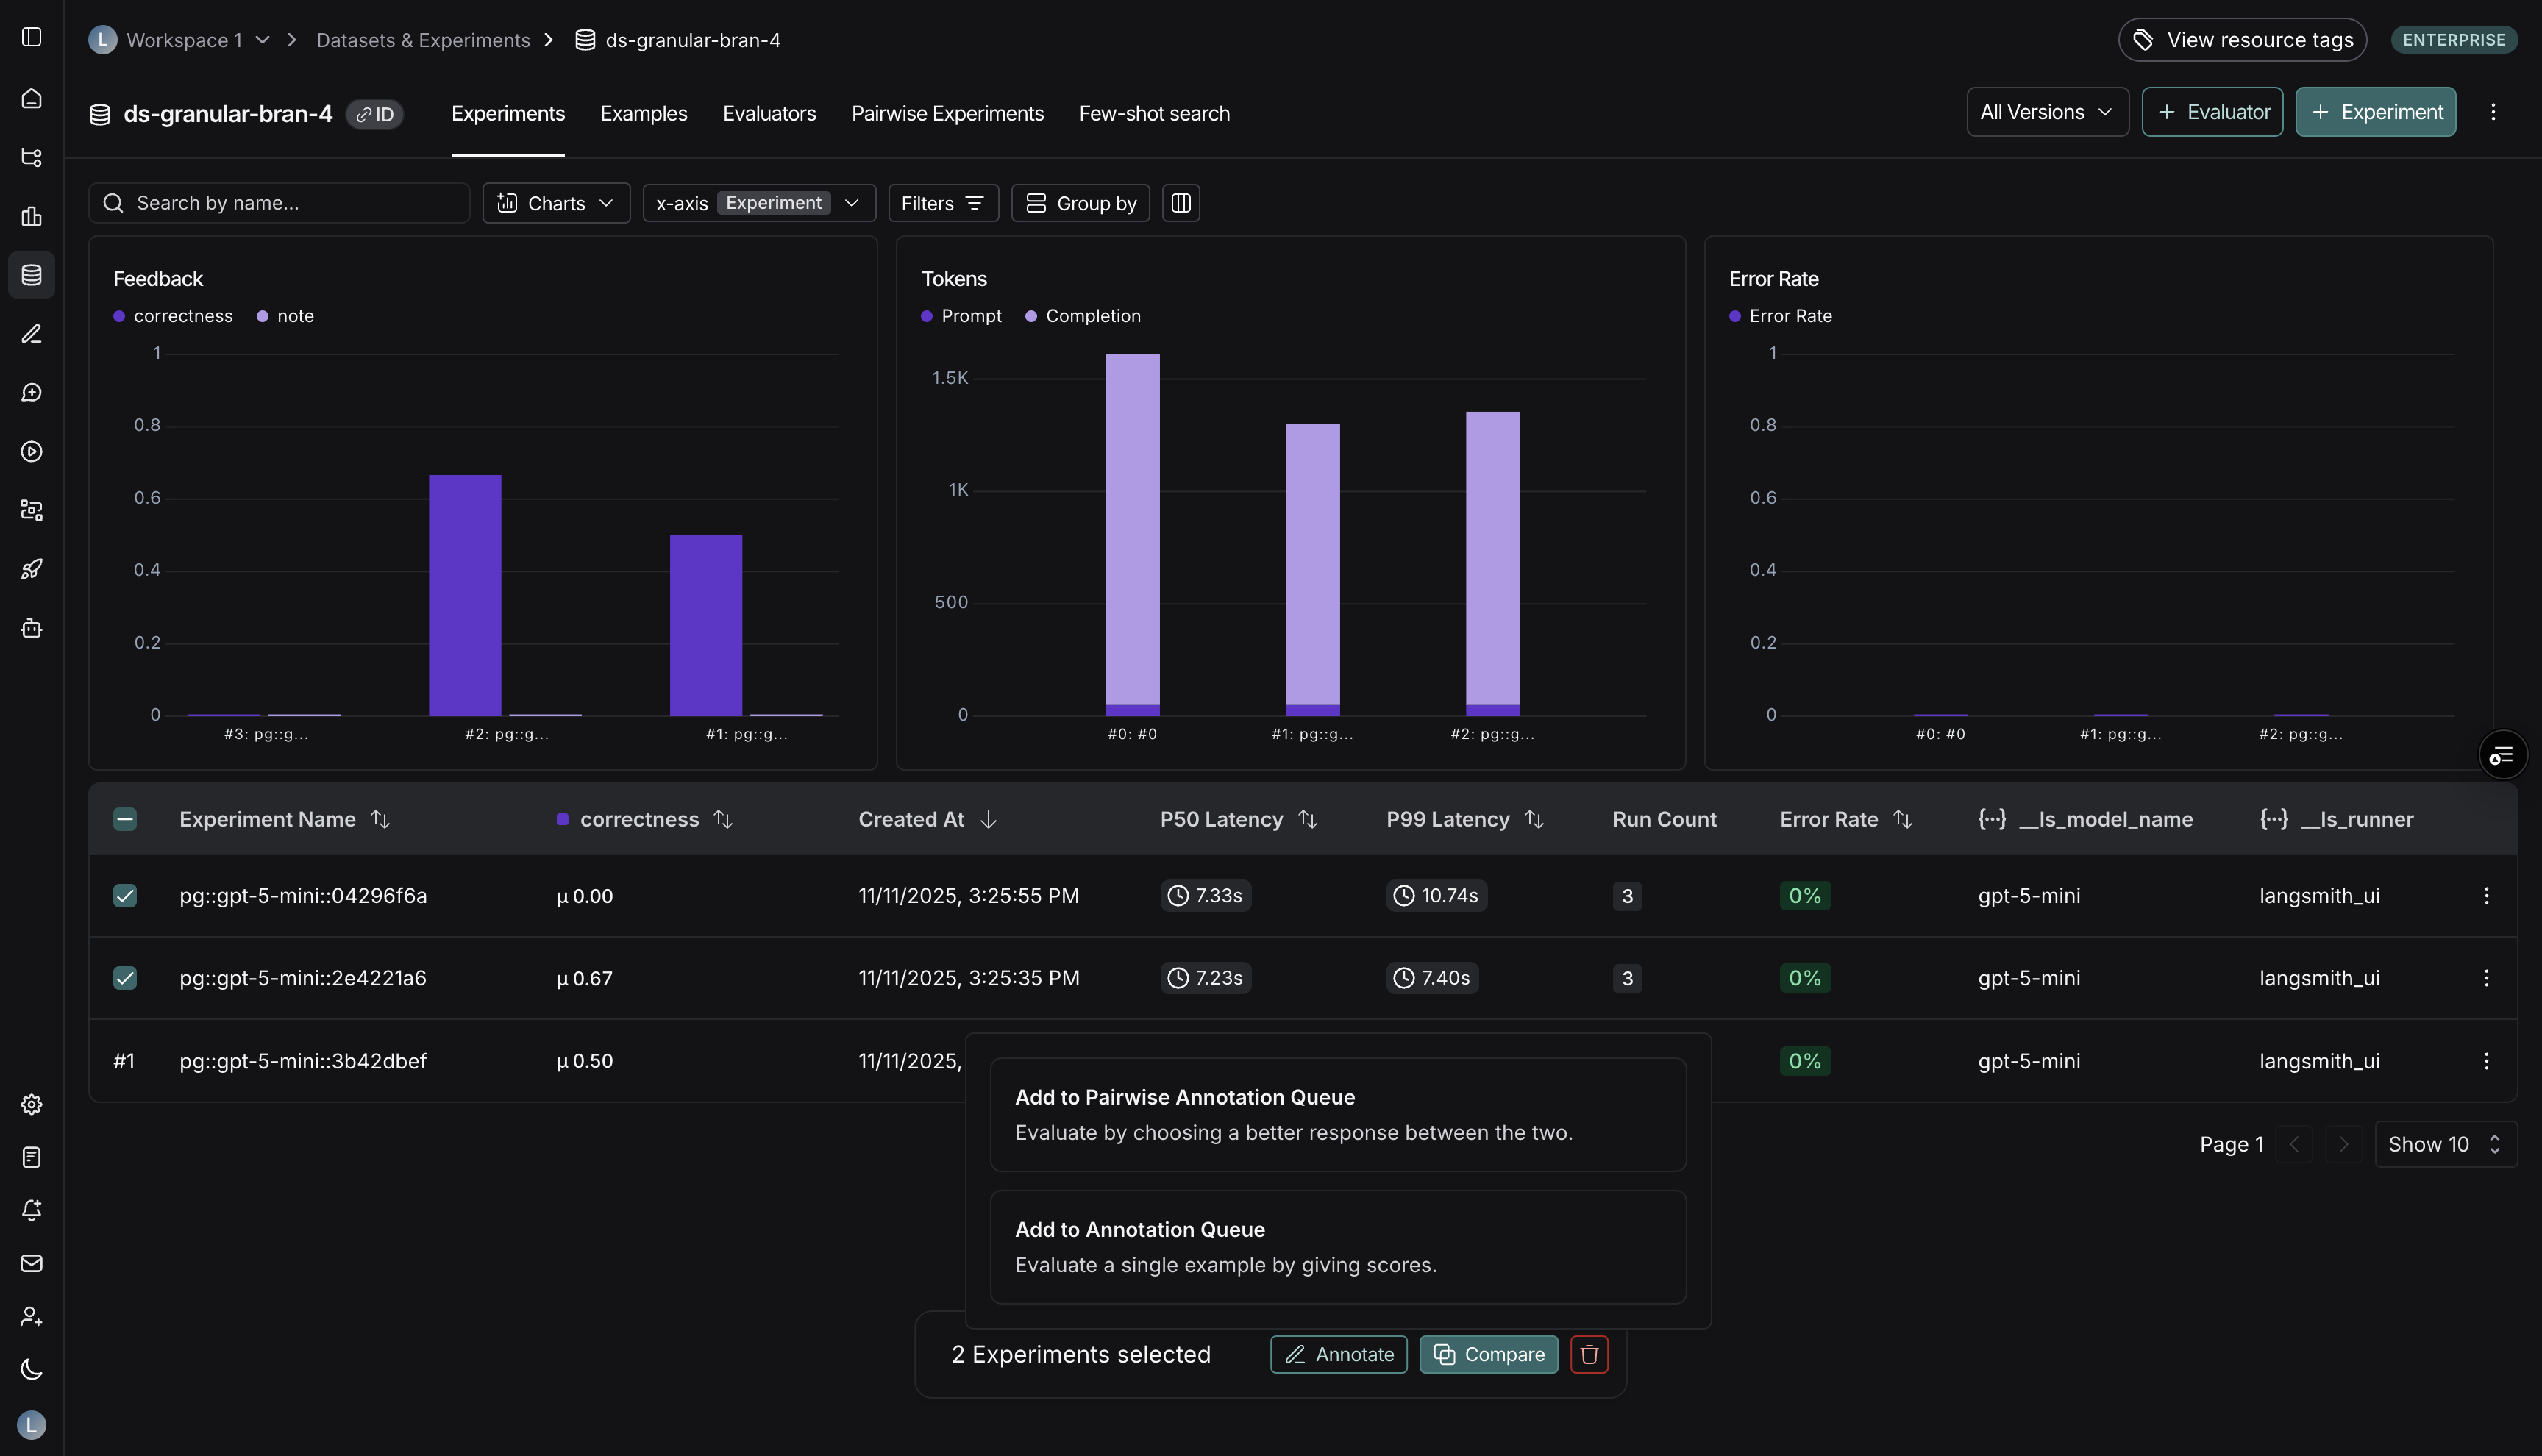
- Decide whether to send the experiments to an existing pairwise queue or create a new one.
-
Provide the queue details:
- Basic details (name and description)
- Instructions & rubrics tailored to pairwise scoring
- Collaborator settings (reviewer count, reservations, reservation length)
- Submit the form to create the queue. LangSmith immediately pairs runs from the two experiments and populates the queue.
- Experiments: You must provide two experiment sessions up front. LangSmith automatically pairs their runs in chronological order and populates the queue during creation.
- Rubric: Pairwise rubric items only require a feedback key and (optionally) a description. Annotators decide whether Run A, Run B, or both are better for each rubric item.
- Dataset: Pairwise queues do not use a default dataset, because comparisons span two experiments.
- Reservations & reviewers: The same collaborator controls apply. Reservations help prevent two people from judging the same comparison simultaneously.
Add more comparisons to a pairwise queue
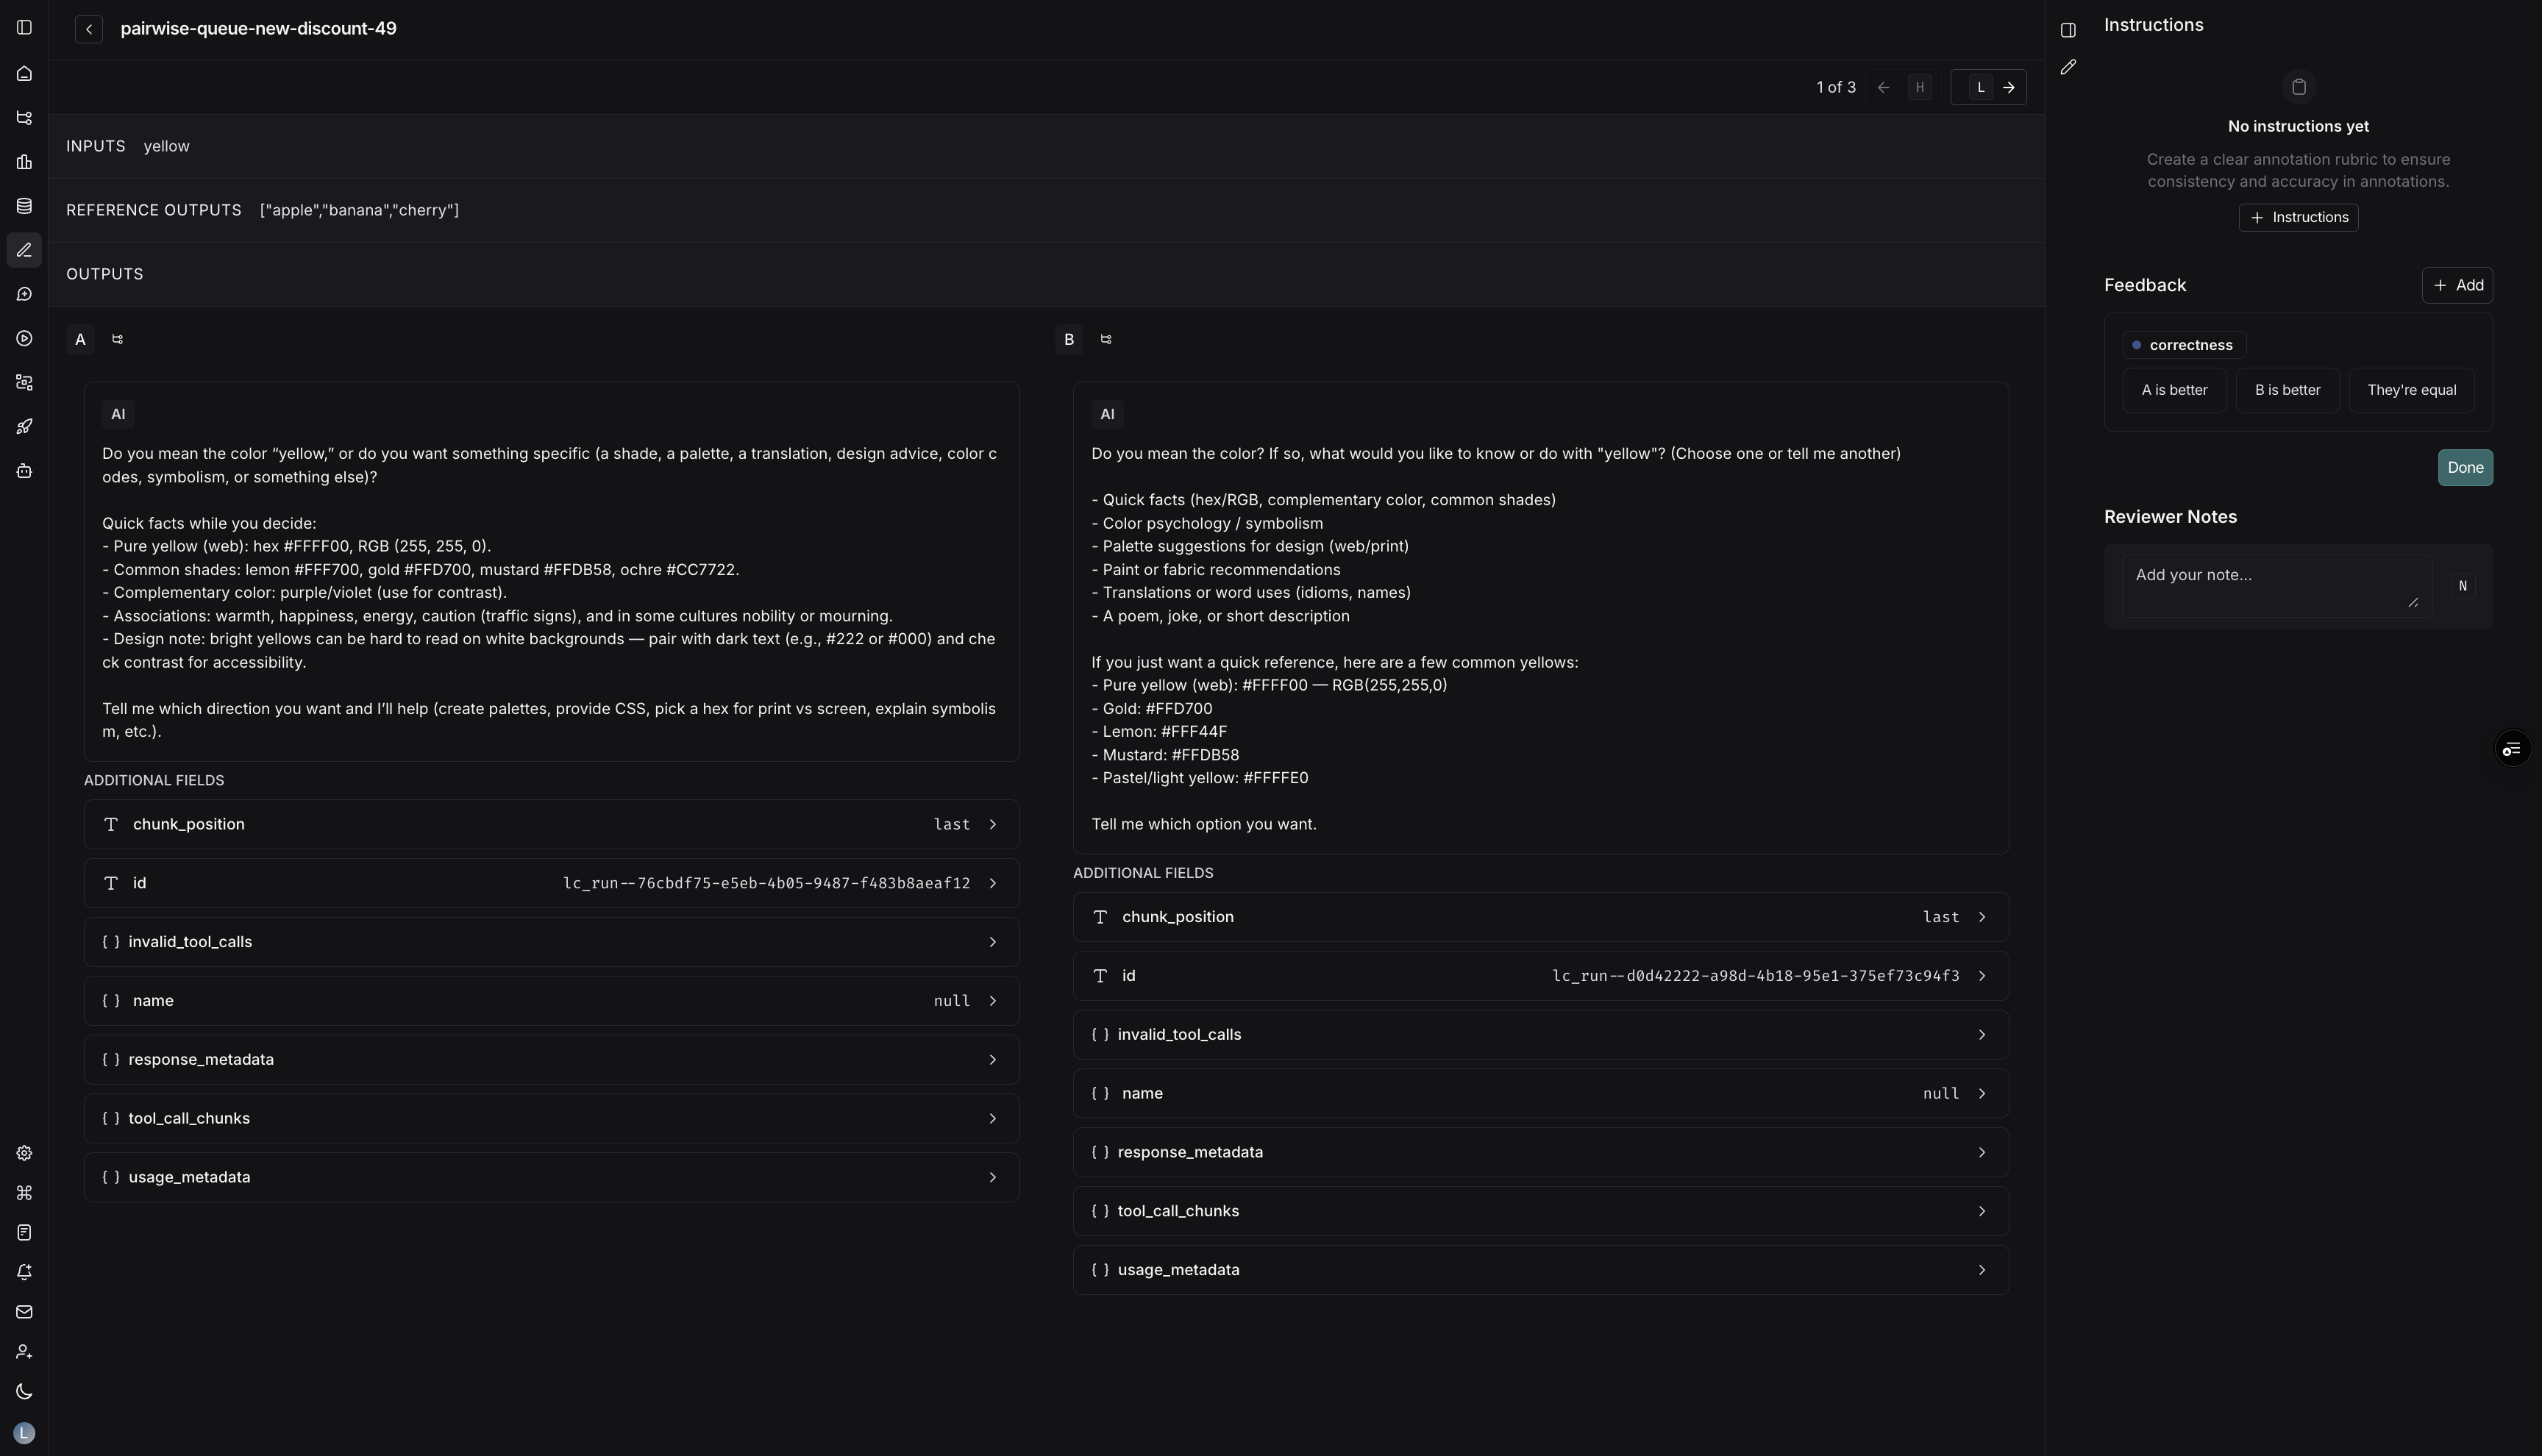
If you need to add more comparisons later, return to Datasets & Experiments, select the two experiments again, and choose Add to Pairwise Annotation Queue to append new pairs. Selecting two experiments and creating a PAQ automatically pairs the runs. When augmenting an existing PAQ, LangSmith preserves historical comparisons and appends new pairs to the queue.Review a pairwise queue
- From Annotation queues, select the pairwise queue you want to review.
- Each queue item displays Run A on the left and Run B on the right, along with your rubric.
- For every rubric item:
- Choose A is better, B is better, or Equal. The UI records binary feedback on both runs behind the scenes.
- Use hotkeys
A,B, orEto lock in your choice.
- Once you finish all rubric items, press Done (or
Enteron the final rubric item) to advance to the next comparison. - Optional actions:
- Leave comments tied to either run.
- Requeue the comparison if you need to revisit it later.
- Open the Details view for deeper debugging.
Consider routing runs that already have user feedback (e.g., thumbs-down) into a single-run queue for triage and a pairwise queue for head-to-head comparisons against a stronger baseline. This helps you identify regressions quickly. To learn more about how to capture user feedback from your LLM application, follow the guide on attaching user feedback.
Video guide
Connect these docs to Claude, VSCode, and more via MCP for real-time answers.