

- Your traces have deeply nested structures.
- You want to focus on specific fields in your data.
- The default heuristic doesn’t show the most relevant information for your use case.
Configure preview format in the UI
Access preview settings
- Navigate to a trace in your project.
- Select the Runs tab.
- Locate the format icon at the top right of the runs table.
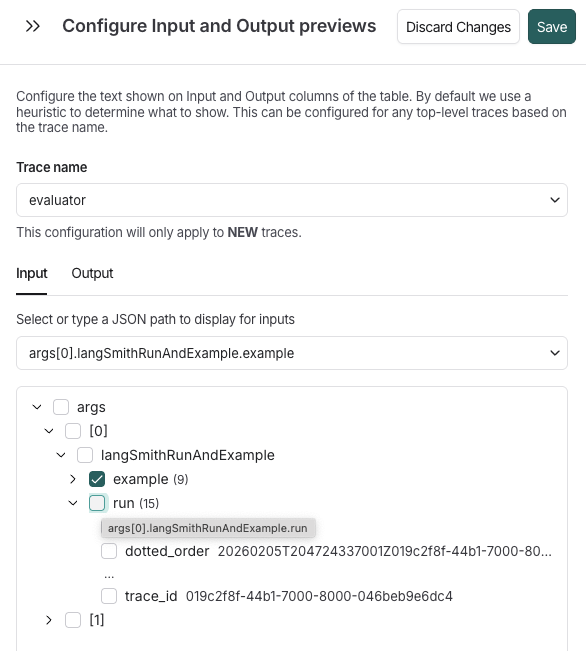
- In the Configure Input and Output previews side window, select a trace name from the dropdown.
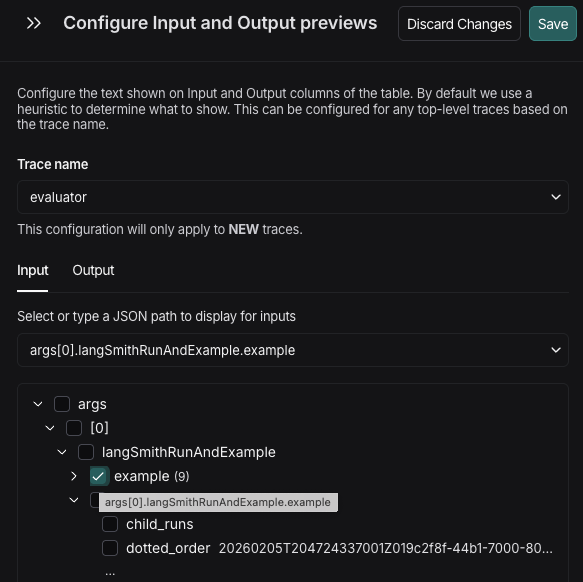
- Field names (e.g.,
messagesfor LLM conversation history,output,metadata). - Array indices (e.g., [0], [1], [-1] for last item).
- Item counts for arrays (e.g., (3) indicating 3 items).
- Preview values for strings and numbers displayed inline.
Set the path
-
Select the Input or Output tab. Then, either the:
- Dropdown to specify the path directly from your input data that should be shown in the preview.
- Interactive tree view of a sample trace’s data structure, which you can explore and select the exact field you want to display.
- Navigate the tree by clicking the arrow icons (▶) to expand or collapse nested objects and arrays.
- Click the checkbox next to the field you want to display in the preview. The selected path appears in the text input preceding the tree.
Arrays with more than 3 items are automatically condensed to prevent overwhelming views:
Example
For example, your trace input is this:messages is an array of message objects, each with a role (such as system or user) and a content field.
To display the user’s question:
- Expand the messages node (shows array items).
- Expand
[1](the second message, which is the user message). - Click the checkbox next to content.
- The input field shows:
messages[1].content.
- Expand messages.
- Expand
[-1]. - Click content.
- Result:
messages[-1].content(always shows the last message).
If you see
"No paths available" in the tree:- Ensure you have at least one successful trace with the selected trace name in the last 7 days.
- The trace must have data in the input/output field you’re configuring.
- Try sending a test trace if needed.
Next steps
- Learn more about viewing and filtering traces.
- Explore custom output rendering for advanced visualization.
- Set up metadata and tags to organize your traces.
Connect these docs to Claude, VSCode, and more via MCP for real-time answers.